File transfer
Transferring files between networks always carries risks. To address this, I plan to create two websites that acts a a layer between my homeLAN and my HomeLabLan
Specifically, users within my home LAN will have the capability to upload files to the website. However, establishing a similar upload functionality from my home LabLAN will be prevented.
Conversely, while downloading files from my home LabLAN will be possible, this action will be restricted from my home LAN.
This one-way data transfer technique resembles a network diode's concept.

How to make a network diode?
What did I used

Configure Debian
I have already set up a Debian virtual machine with two network interface cards. One of these cards is linked to the PCIE passthrough NIC from ESXi, while the other is connected to a trunked port group. I will create a post on how to install Debian and do some hardening with it.
Since this server requires consistent accessibility, I will assign a static IP to each of the two network interface cards.
Follow these steps to set a static IP.
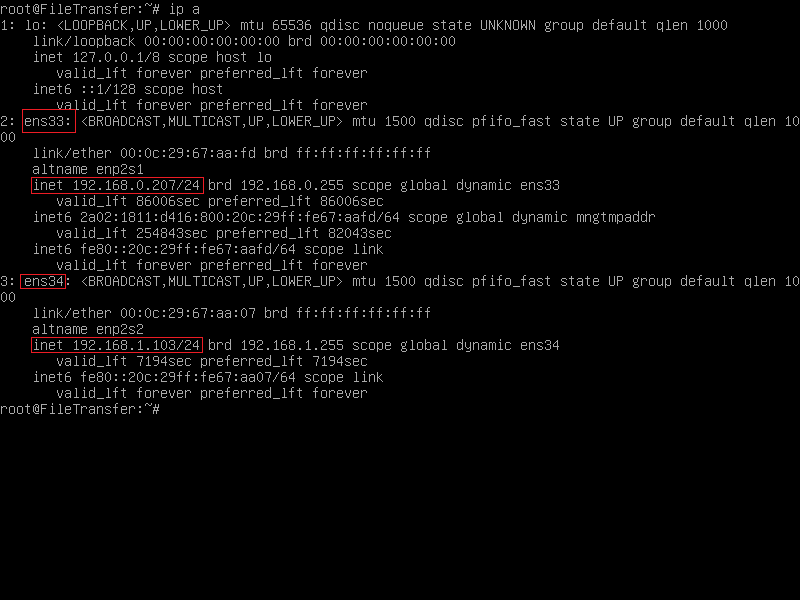
First you will need the name of NIC's, Type "ip a" in the console to find those 2 names. As you can see in the picture mine are "ens33" and "ens34". ens33 is connected to my HomeLan, ens34 is connected to my HomeLab
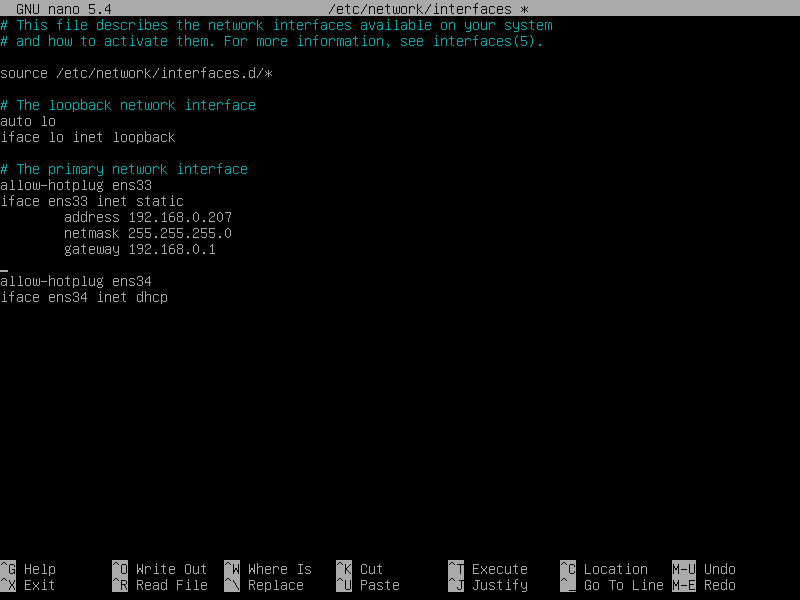
To set static IP adresses in Debian you will need to open "/etc/network/interfaces". I will use nano as text editor, type 'nano /etc/network/interfaces' to open this file.
As you can see from the picture I already altered the entry for ens33 to use a static IP. For ens34 i will choose an IP like 192.168.1.2. By removing the gateway entry, the Debian system will lose its internet connectivity which is not a bad thing because it doesn't need one. However, during the package installation process, it will be necessary for it to establish an internet connection. That is way the value is filled in. edit the file as you like and press:
- ctrl-x, to close the file
- yes followed by enter, to save the file
Installing Apache2 & PHP
Installing packaged on debian is straitforeward, you just need to enter following commands:
- apt-get update
- apt-get upgrade
- apt-get install apache2 php -y
echo "<?php phpinfo();?>" > /var/www/html/index.php
Afterward, you can navigate to http://192.168.0.207/index.php in your web browser. If everything is functioning as expected, you should observe a display resembling the image provided.

Configure Apache2
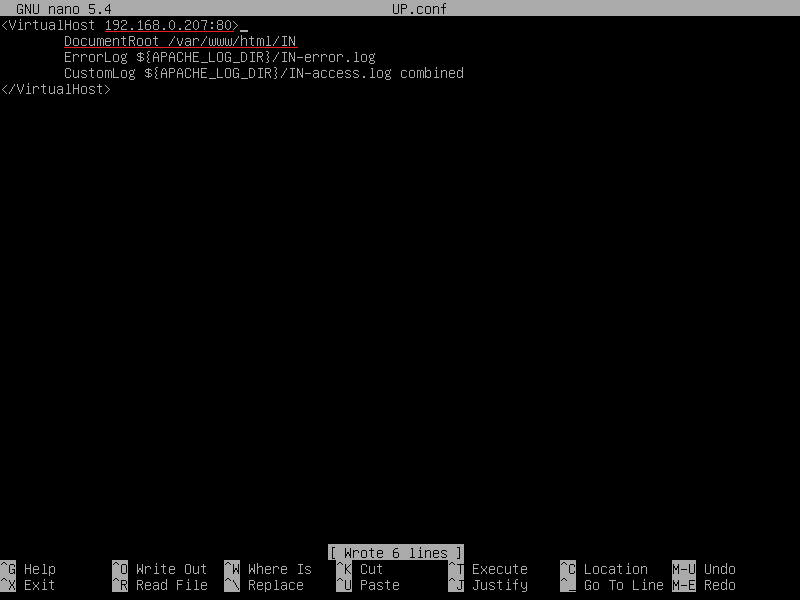
Apache2 offers the capability to host multiple virtual hosts, allowing them to be accessed through their respective server names. Additionally, you have the option to bind a virtual host to a specific NIC.
My plan is to have 2 vhosts, 1 binded to the ens33 NIC and the other one to the ens34. To create a new VHOST you have to copy the default config file and alter the necessary options.
- cp /etc/apache2/sites-available/000-default.conf /etc/apache2/sites-available/UP.conf
- cp /etc/apache2/sites-available/000-default.conf /etc/apache2/sites-available/DOWN.conf
- a2ensite UP.conf DOWN.conf
- systemctl restart apache2
HTML files
I have uploaded the HTML file on my GitHub repository. Feel free to download it. The PHP code is quite self-explanatory, so I won't delve into too much detail here. Just ensure that these files are placed in the appropriate folder.
/html/IN/index.php needs to be in /var/www/html/IN
/html/OUT/index.php needs to be in /var/www/html/OUT
Those folders are specified in the vhost config files. In the OUT folder you will have to create a "uploads" folder.
Auto clean functionality
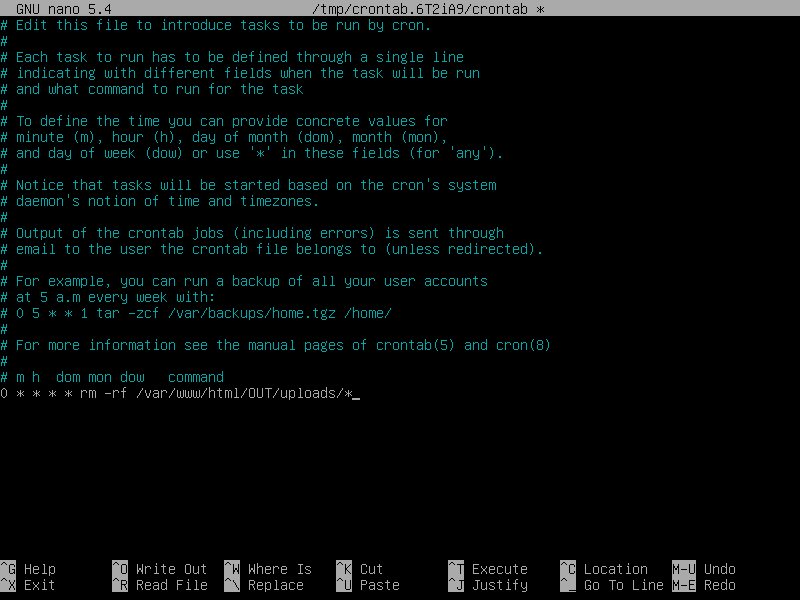
For now i will use crontab to delete the content of the uploads folder, every hour the entire content will be deleted. I plan to create a bashscript later that will only delete the files that are older then 1h. To create a cronjob type following commands:
- crontab -e, the will open a editor. (if it ask to select a editor i recommand nano)
- and type "0 * * * * rm -rf /var/www/html/OUT/uploads"