VPN, What is it?
During my time in college, I enrolled in a course that required me to teach young children.
In one instance, a child was curious about what a VPN is, and I explained it as follows.
A VPN, stands for "Virtual Private Network," it's tunnel for the internet.
Imagine you have a secret tunnel that you can use to go to your friend's house without
anyone seeing you.
When you use the internet, your computer usually talks to websites , and people might be
able to see what you're doing.
But when you use a VPN, it's like you're going through a secret tunnel before you visit any
website.
This secret tunnel makes sure that nobody can see what websites you're visiting or what
you're doing online because the VPN keeps your information safe and hidden.
Just like you use your secret tunnel to visit your friend's house without anyone knowing, a
VPN lets you use the internet without anyone spying on you.
I still use this analogy to explain a VPN in the most simple way.

PfSense and VPN
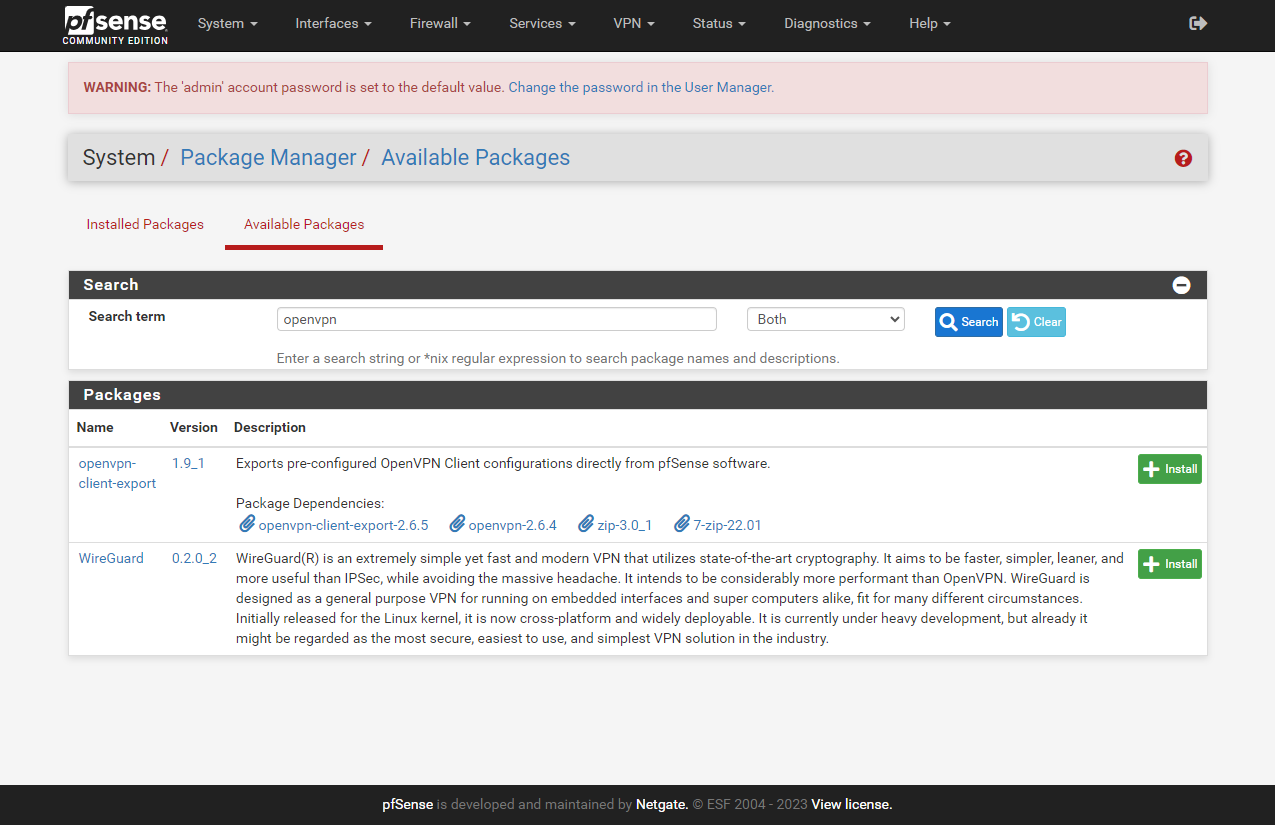
Out of the box Pfsense provide a variety of VPN protocols like.
- OpenVPN
- IPSec
- L2TP/IPsec
- PPTP
Certificates
Create a Certificate Authority
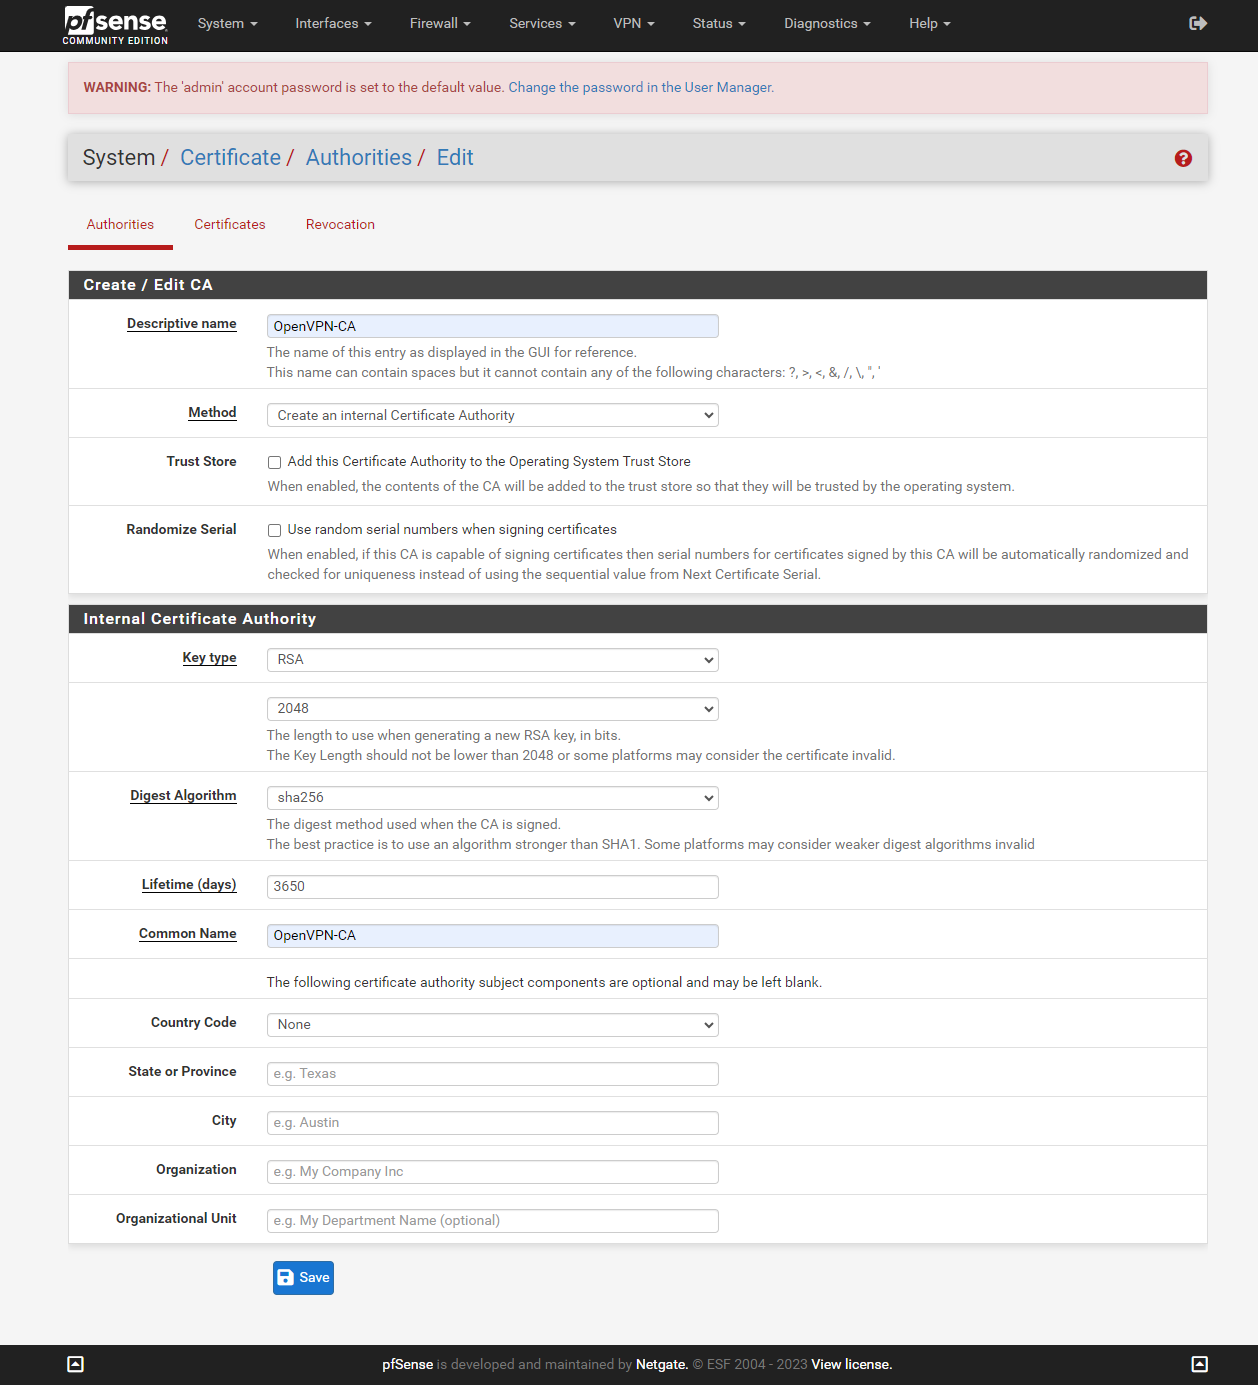
OpenVPN utilizes certificates for operation. In order to generate these certificates, a Certificate Authority, or CA , is required. PfSense can seamlessly function as a Certificate Authority.
Navigate to the system and access the certificates. Inside, opt for the Authorities option and select Add Assign a name of your preference and keep the default settings for the remaining fields.
Create a server certificate
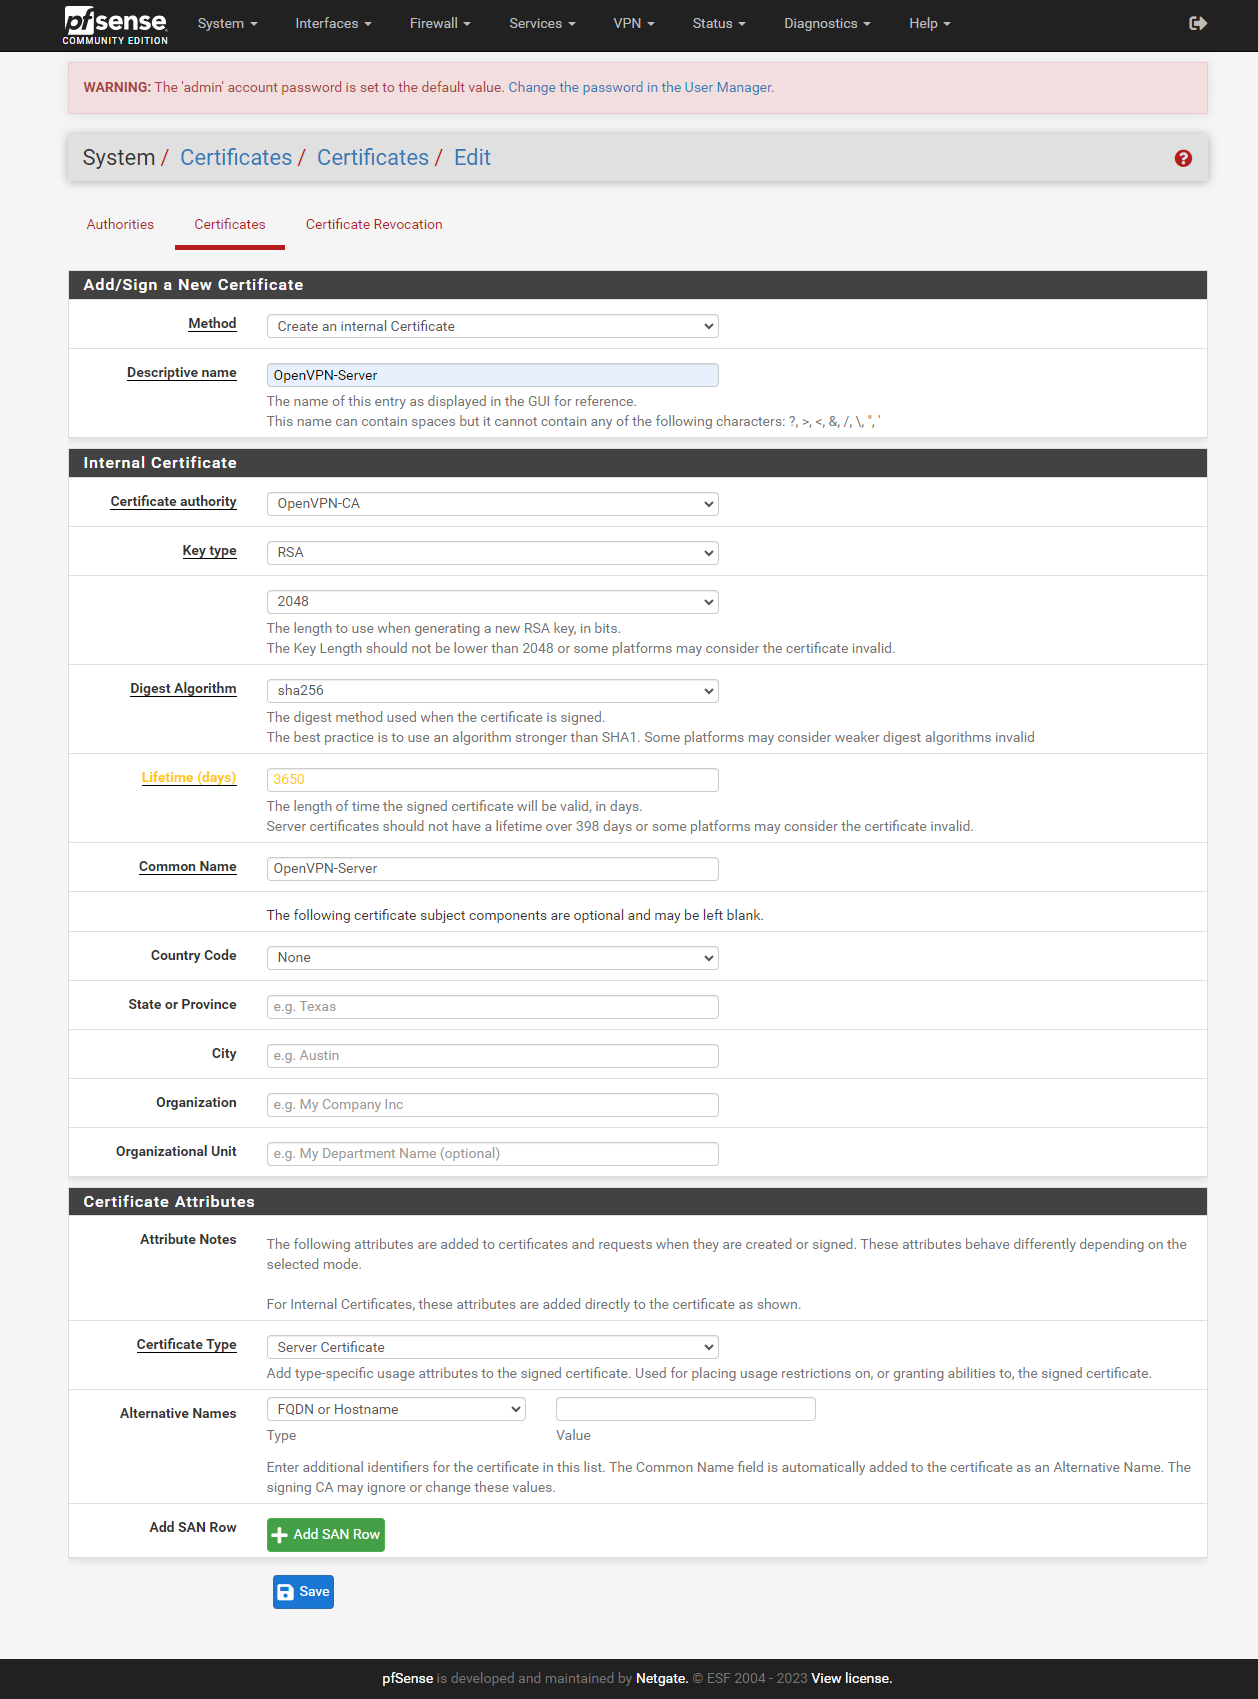
Now we have our Certificate Authority working, we can proceed to generate a server certificate. To accomplish this, simply navigate to the "Certificates" section. From there, click on "Add/Sign," and proceed by selecting a meaningful "Descriptive name", input a "Common Name" of your choice. Remember to ensure the "Certificate Type" field is set to "server certificate".
Create a user certificate
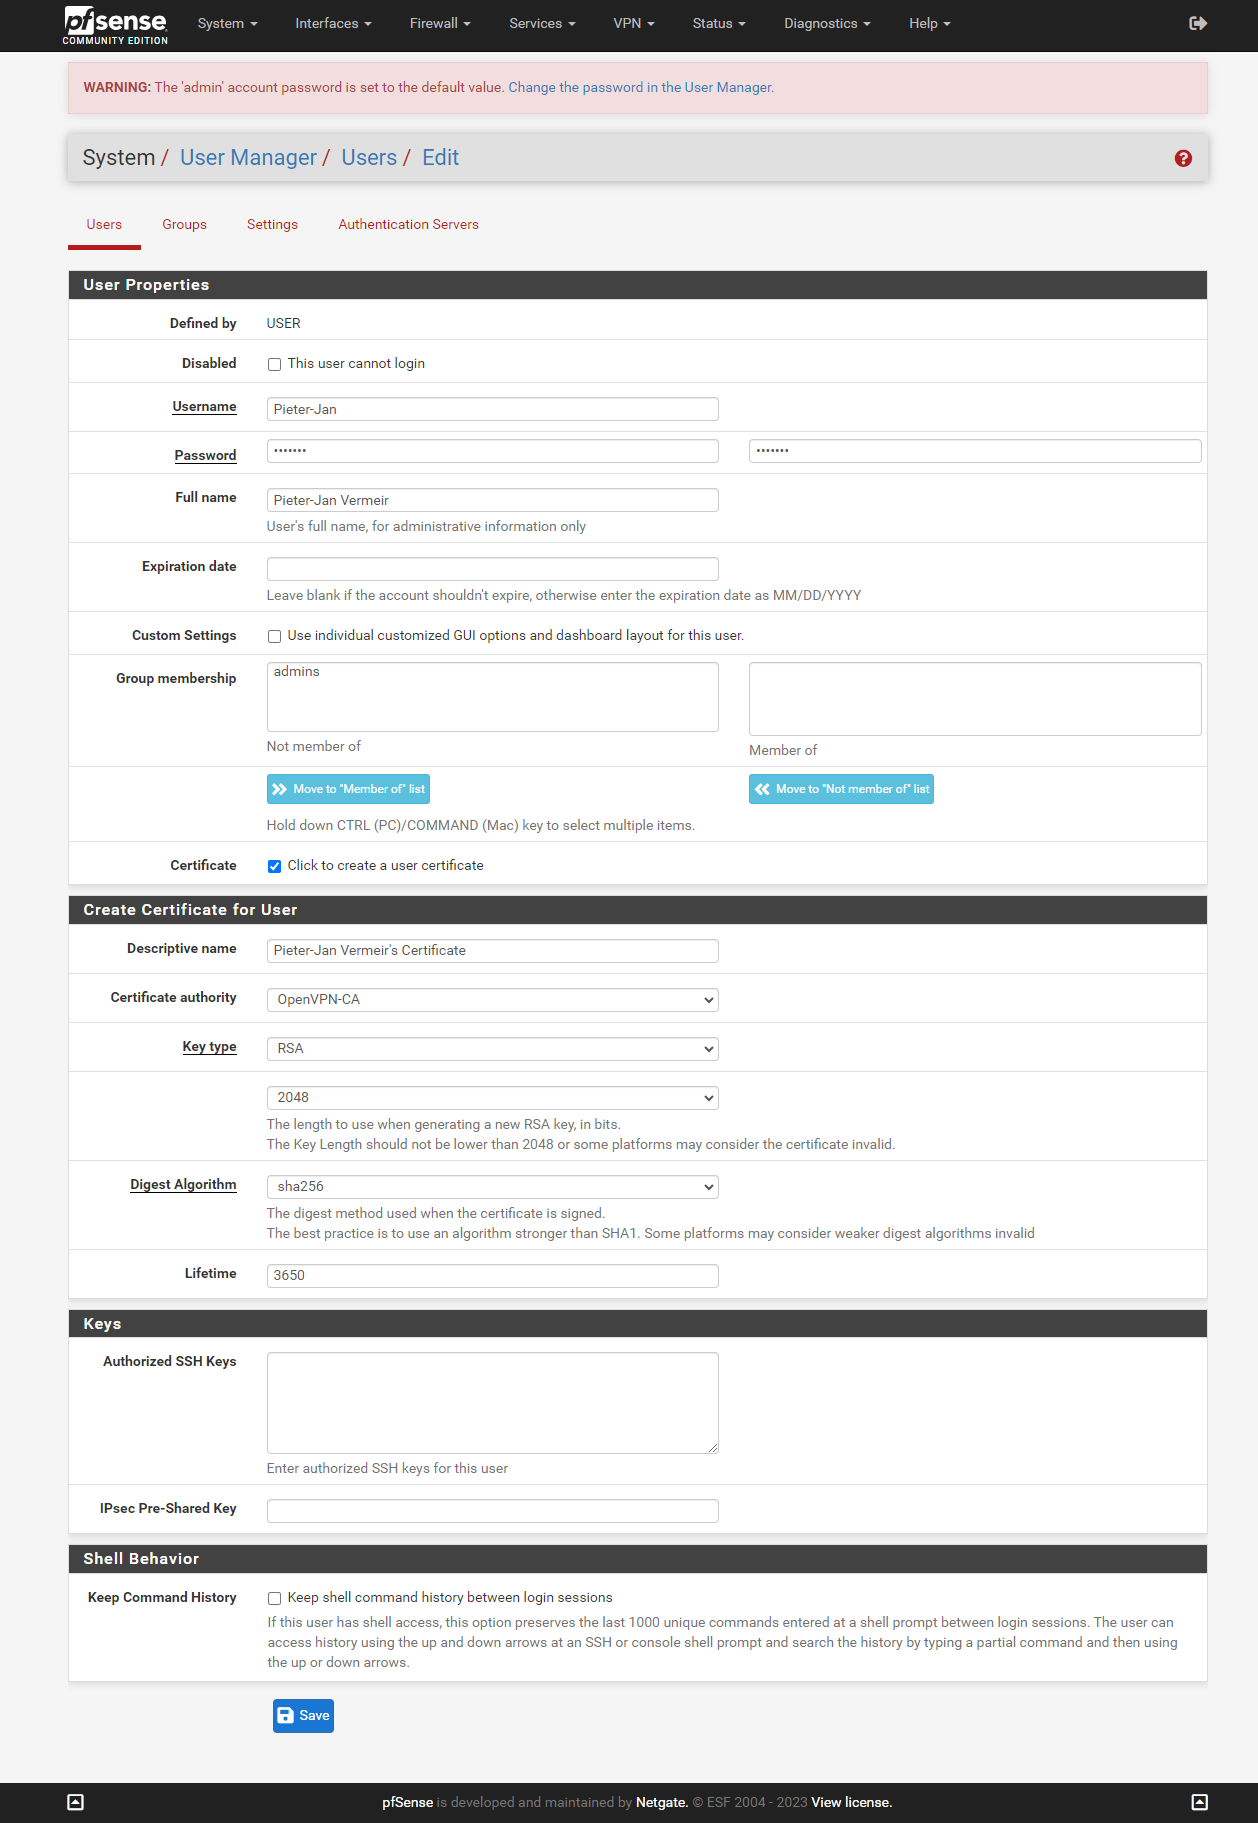
One more certificate need to be created before we can create our OpenVPN server. The user certificate, we need to add an user to our PfSense users. In the menu bar click on System and select user manager. Click on add to create a new user.
Select a username and password, and then enable the "Click to create a user certificate" option. A new section will be shown on the page, select a "Descriptive name" of your choice. and press save
OpenVPN server
Creating a OpenVPN Server
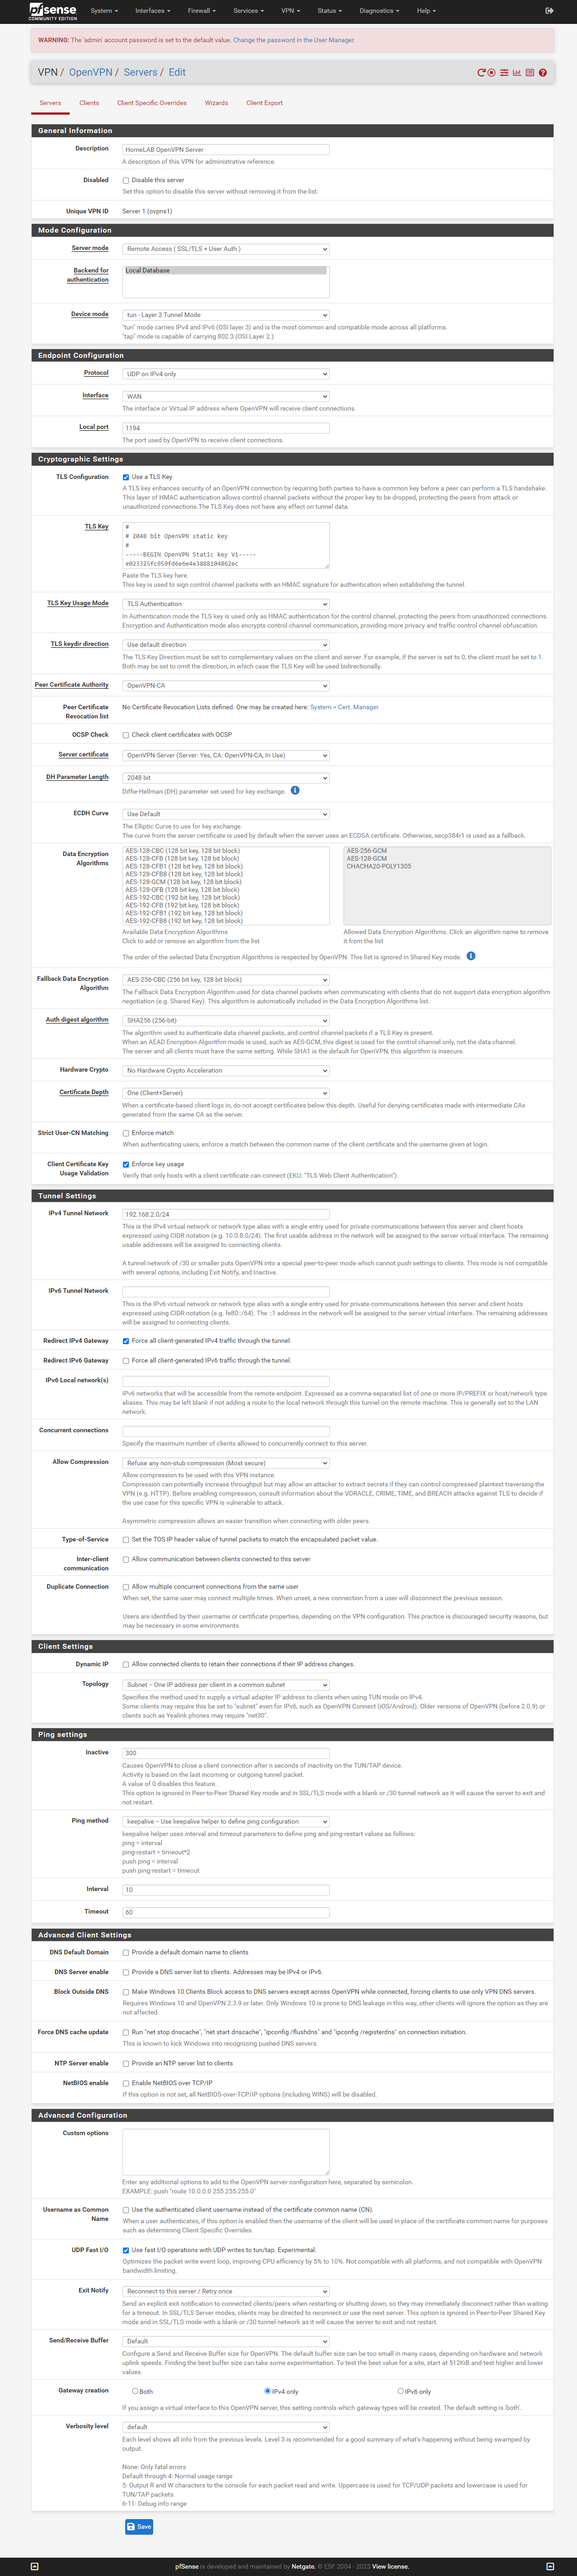
From the menu bar select VPN and click on OpenVPN. Opt for Servers and click on add.
Please, don't feel overwhelmed by all the fields, you can leave most of the fields as their default settings. The only fields that require input are:
- Description: Here you have to give a meaningful name to you server
- Server mode: Select "Remote Access ( SSL/TLS + User Auth )" and make sure
"Local database" is selected as backend for authentication
- Peer Certificate Authority: You shoud be able to select the CA we made
- Server certificate: Select the created server certificate.
- IPv4 Tunnel Network: Here you have to set a dedicated IPv4 subnet that the OpenVPN users will use.
- redirect ipv4 gateway: Checked, this will allow access to other networks on the firewall
- UDP Fast I/O: Enabled
- Gateway creation: IPv4 only
Create a user config
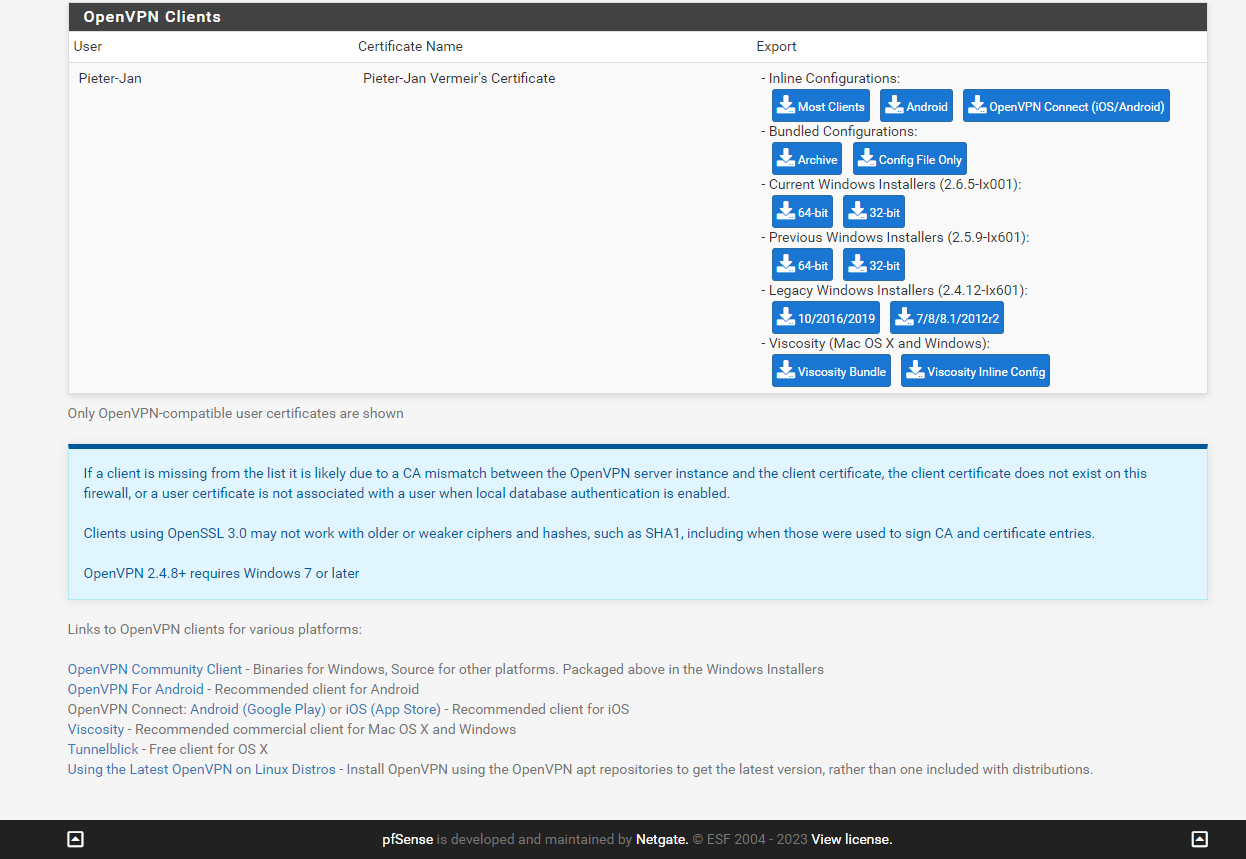
OpenVPN operates using "ovpn" files, which are specifically designed for use with the OpenVPN Connect app. To create such file Navige to "Client Export", on the bottom of the screen you will see you created user. There select "Most Clients", a ovpn file will be downloaded.
Firewall
Allow incomming connections from the WAN
Now that our VPN server is up and running there is 1 last thing we need to configure.
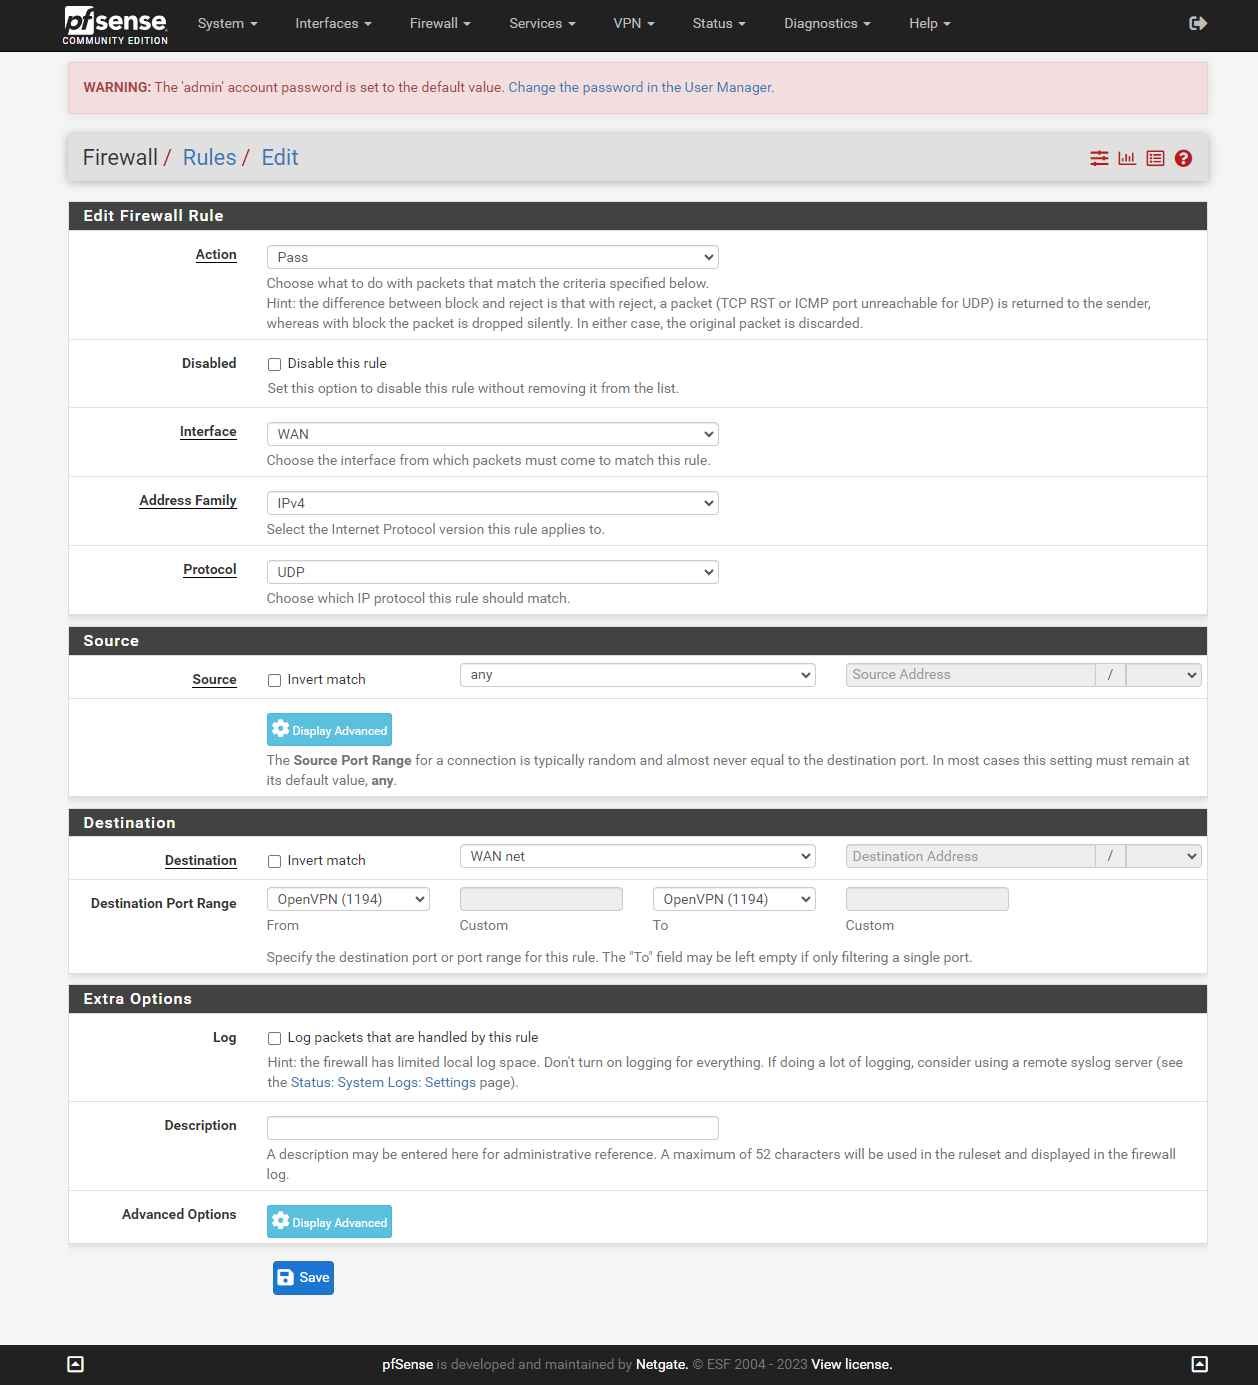
We have to allow incomming OpenVPN connections, to do so navigate to Firewall and click on rules.
Select WAN and click on "Add".
For protocol choose UDP.
For Destination choose WAN net, and for port range select OpenVPN (1194).
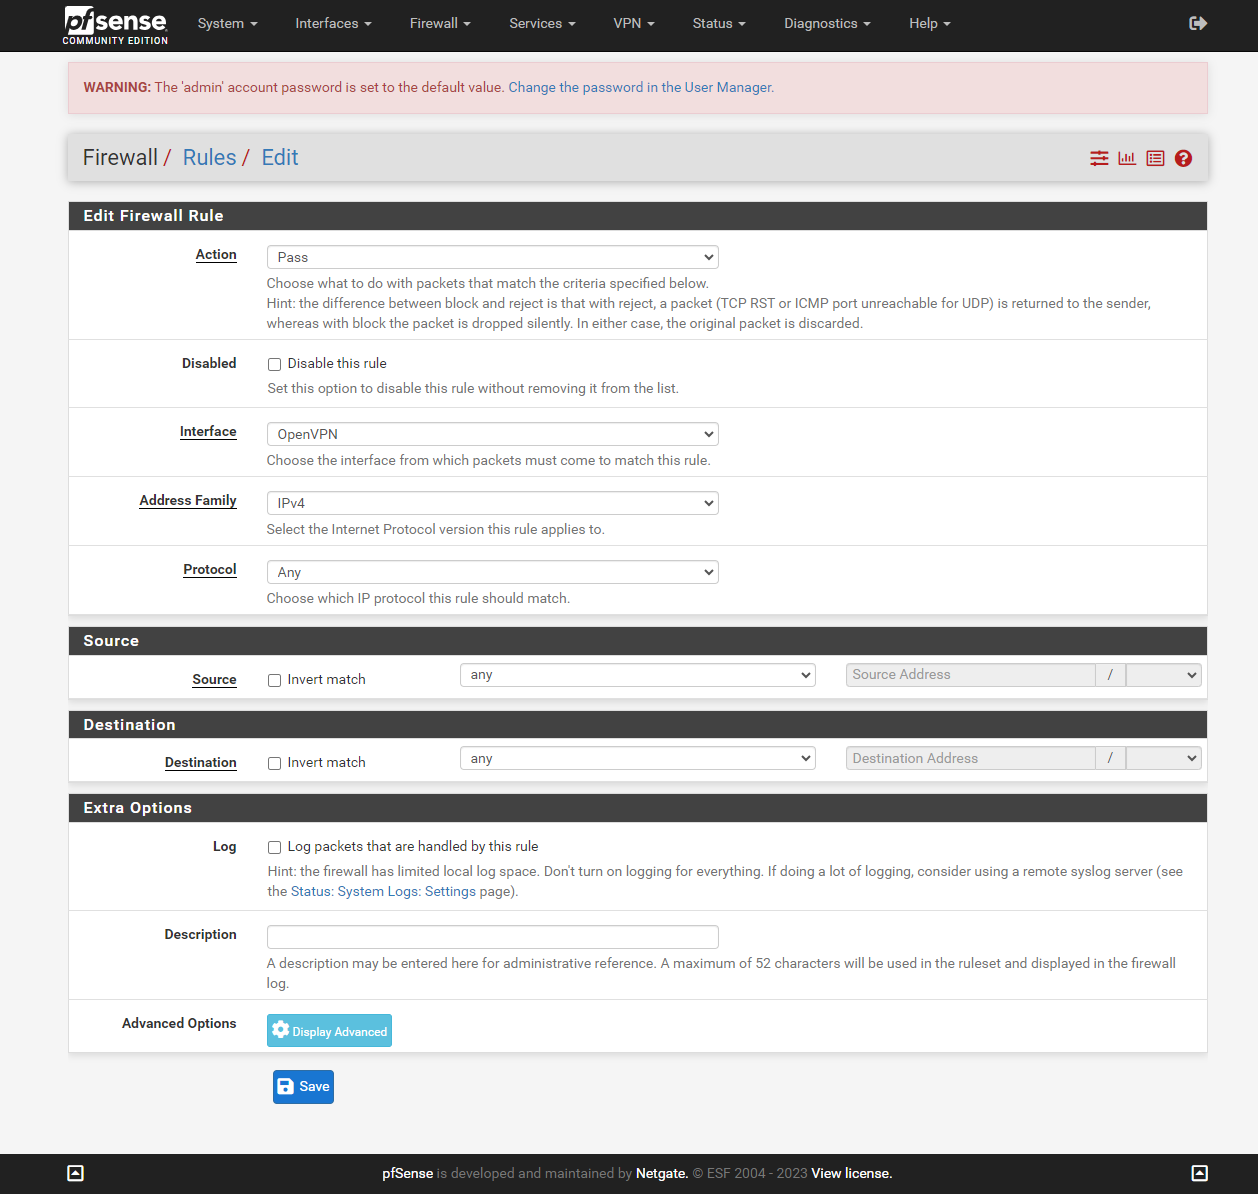
Allow outgoing connections from the OpenVPN network
Now select OpenVPN and click on add rule. Here, you have the option to select the specific network you wish to access while connected to the VPN. Currently, I have configured the VPN network to be able to reach any other network. In the future i will only allow http,https,ssh and RDP to all networks.
Connecting to the OpenVPN server
Windows
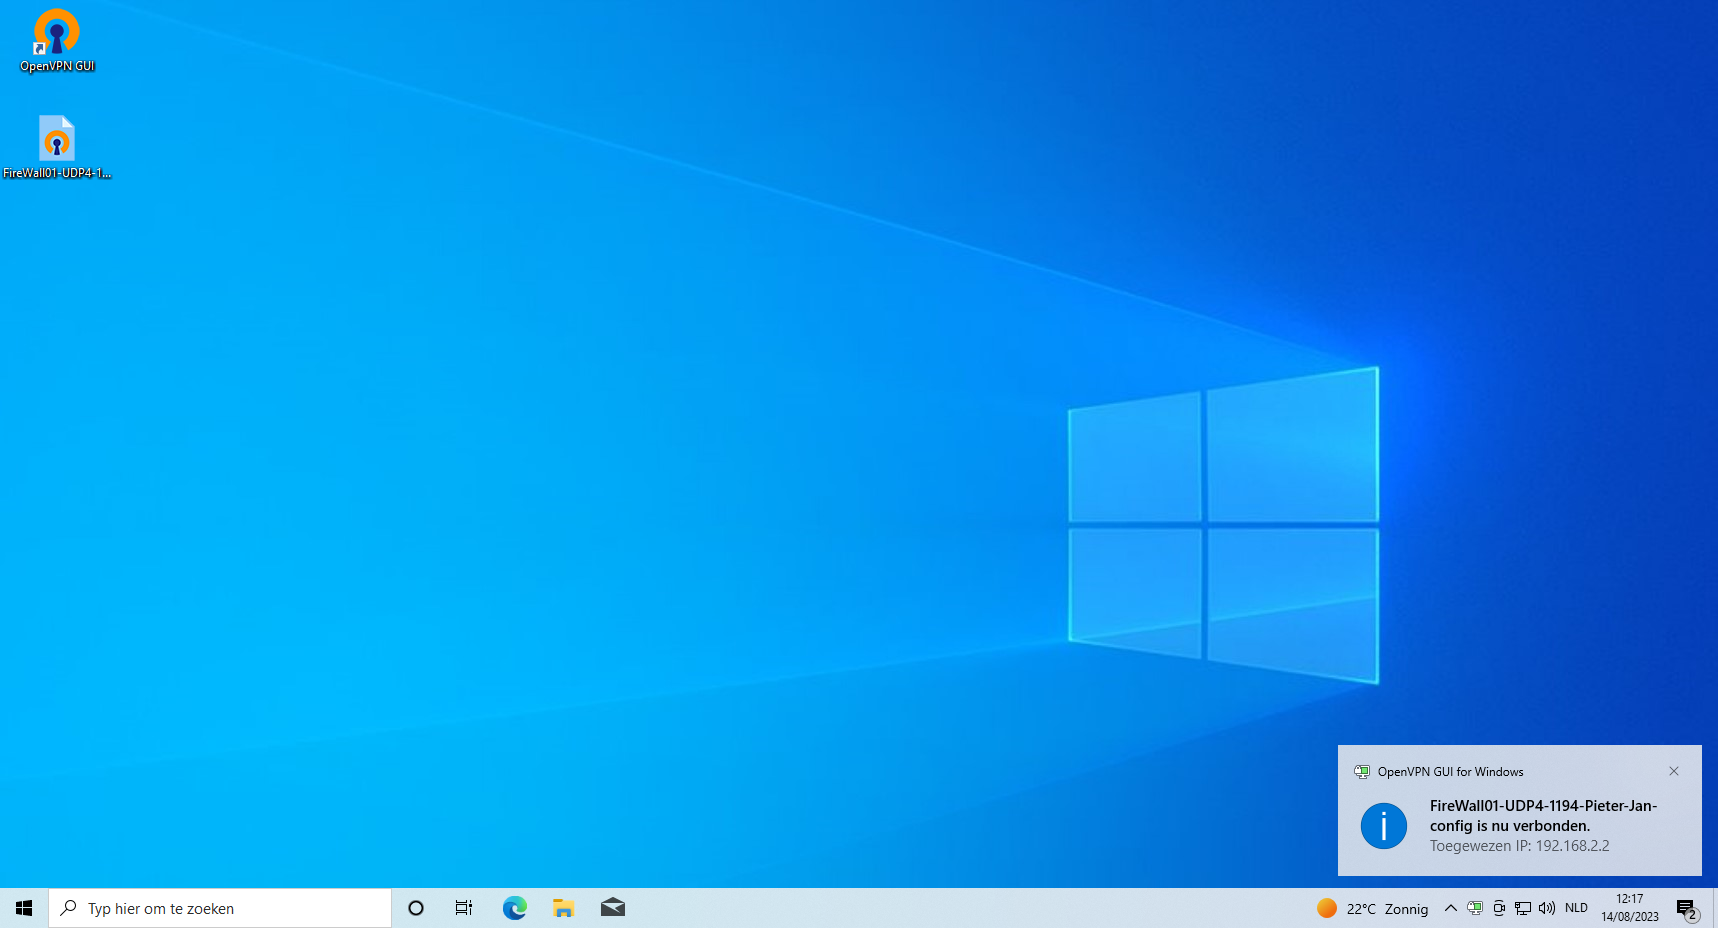
To establish a connection to the OpenVPN server, you'll require a software called "OpenVPN Connect." This program can be obtained at no cost from the official website. Please proceed to download and install it to begin. Here you will need to have you Client export file (ovpn), which we downloaded earlier. Dubble click on the client export, OpenVPN will ask if you want to import the file, select yes. Next you need to enter the credentials from the created user.
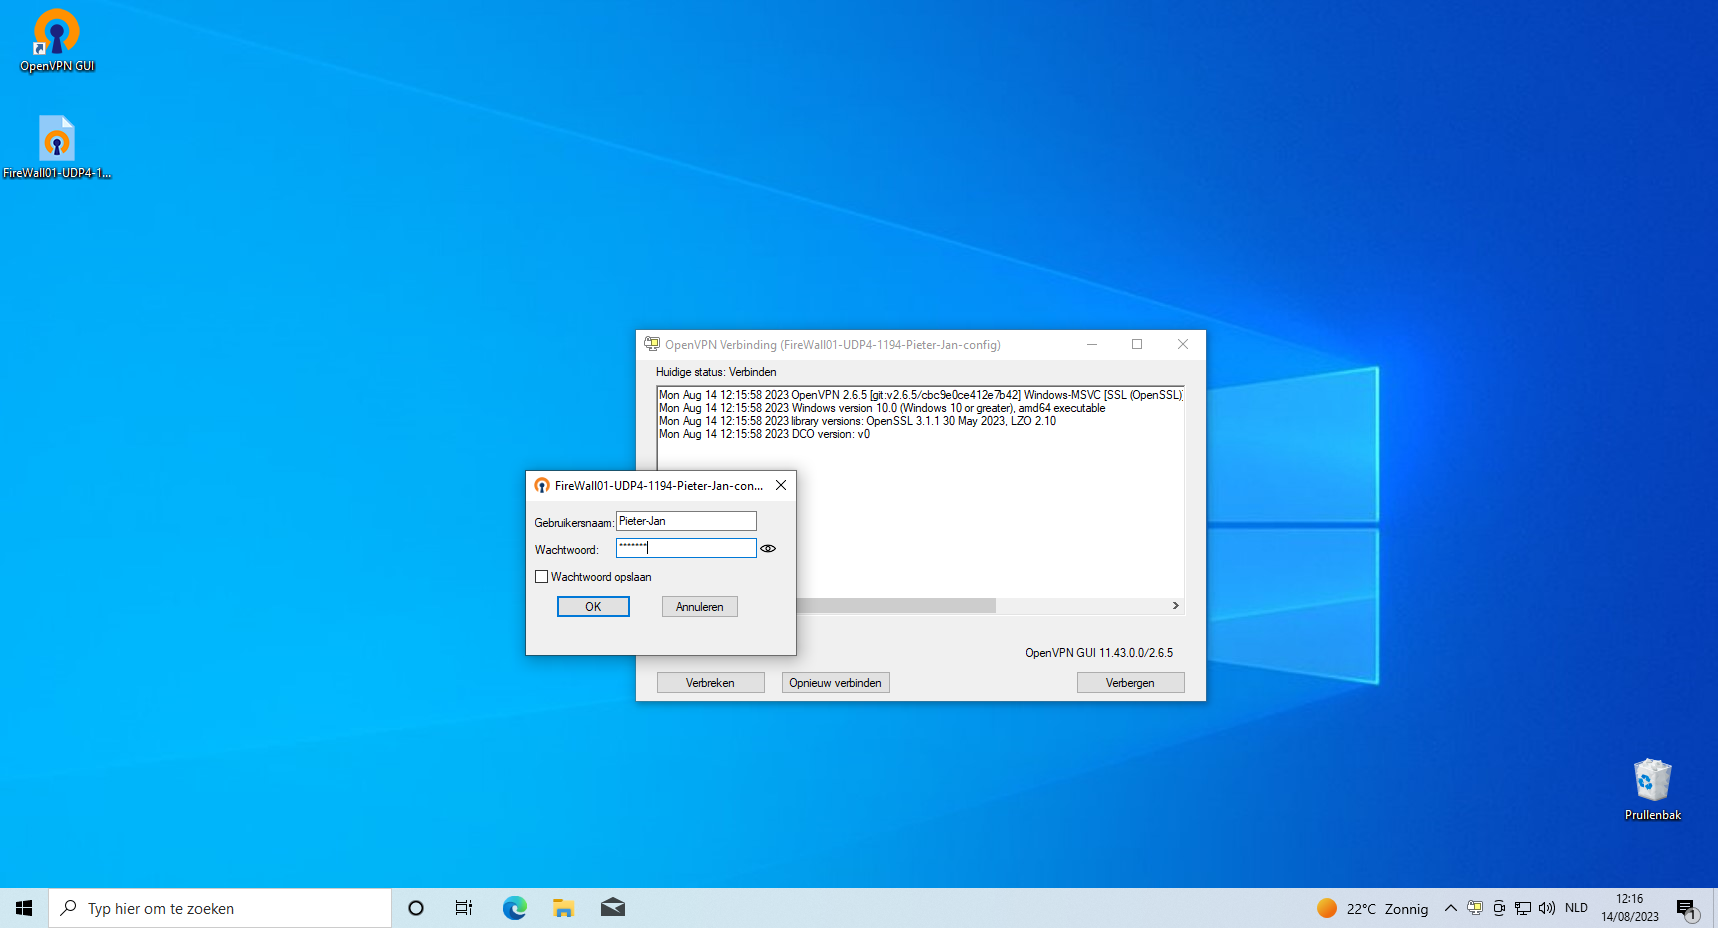
Once all configurations are set up accurately, you should receive a notification confirming your successful connection to the network. Additionally, you'll notice a green computer screen icon in the OpenVPN interface, indicating your active connection.
To test if you are indeed contected to the network you should be able to surf to https://192.168.1.1. Which is the adress of PfSense on the LAN side. This IP adress can be read from the PfSense console screen.