What is a hypervisor?
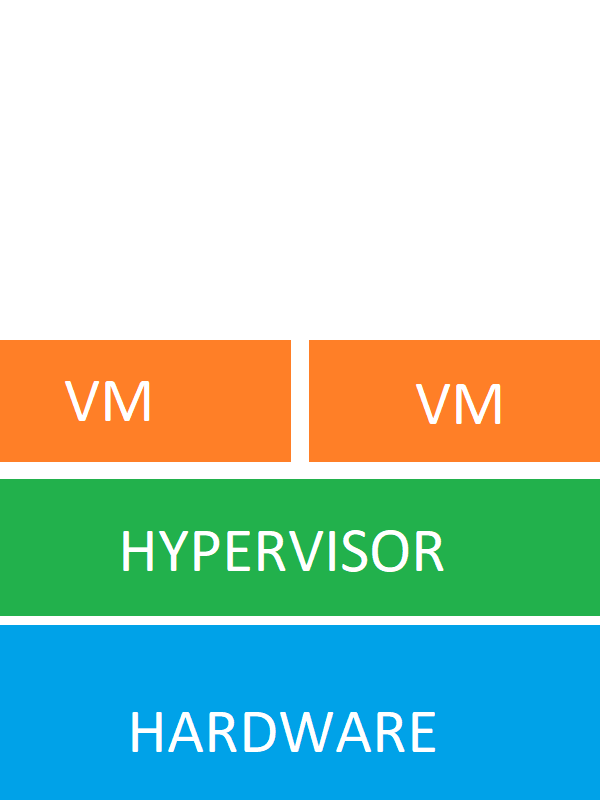
I think the hypervisor is an amazing technology. It is a piece of software that allows multiple virtual machines to run on a single physical machine. It acts as a layer between the physical hardware and the virtual machines, making it possible to share the resources of the physical machine between the different virtual machines. Each virtual machine behaves as a completely independent system with its own operating software.
There are numerous software vendors offering their own hypervisor solutions, such as VMWare, Microsoft, Citrix, Oracla etc... I have chosen VMWare's ESXI as the hypervisor for my home lab environment. In my opinion, VMWare stands out as the superior choice compared to other alternatives. ESXI is a type 1 hypervisor, more on that in the next section.
Different types of hypervisors
Type 1: Bare-Metal Hypervisor
They are typically used in server environments and provide high performance and efficiency. Type 1 hypervisors are preferred for production environments where performance and resource utilization are critical These hypervisors run directly on the physical hardware without the need for a host operating system.
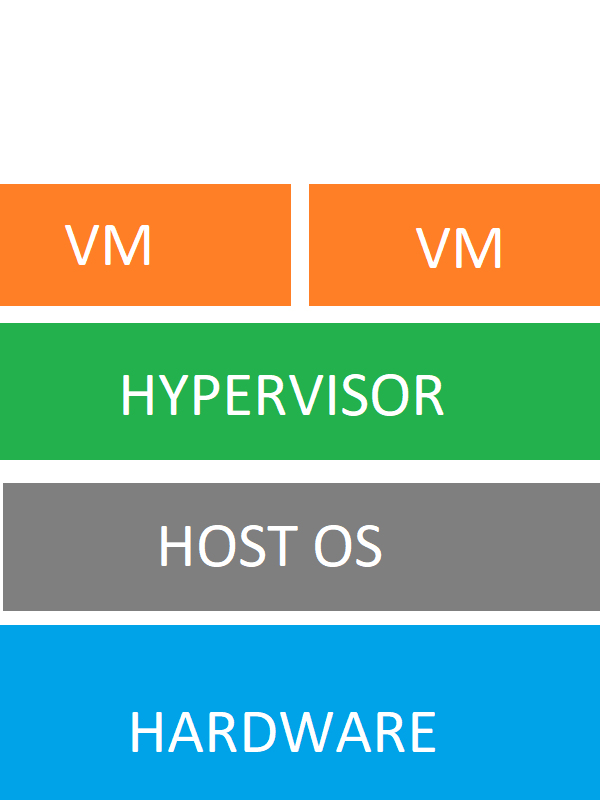
Type 2: Hosted Hypervisor
They are commonly used on desktop and laptop computers for virtualizing different operating systems for testing or development purposes. Type 2 hypervisors are more suitable for personal use and development scenarios. These hypervisors require a host operating system, like Windows, Linux, to function and run as applications within it.
ESXI - Installation
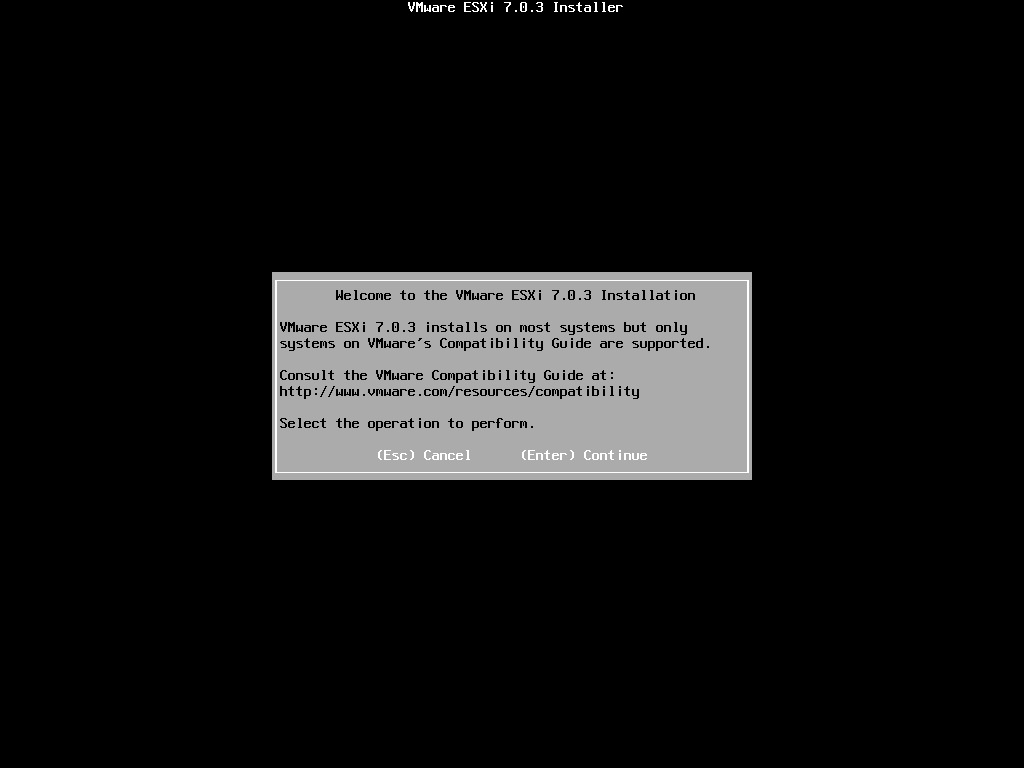
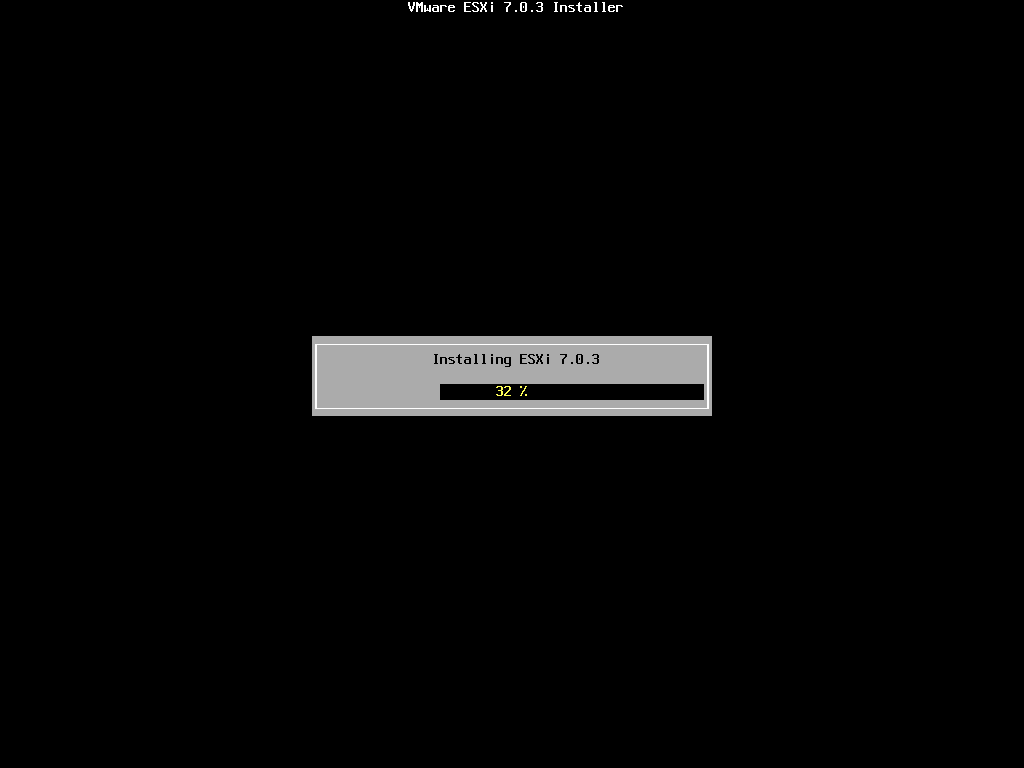
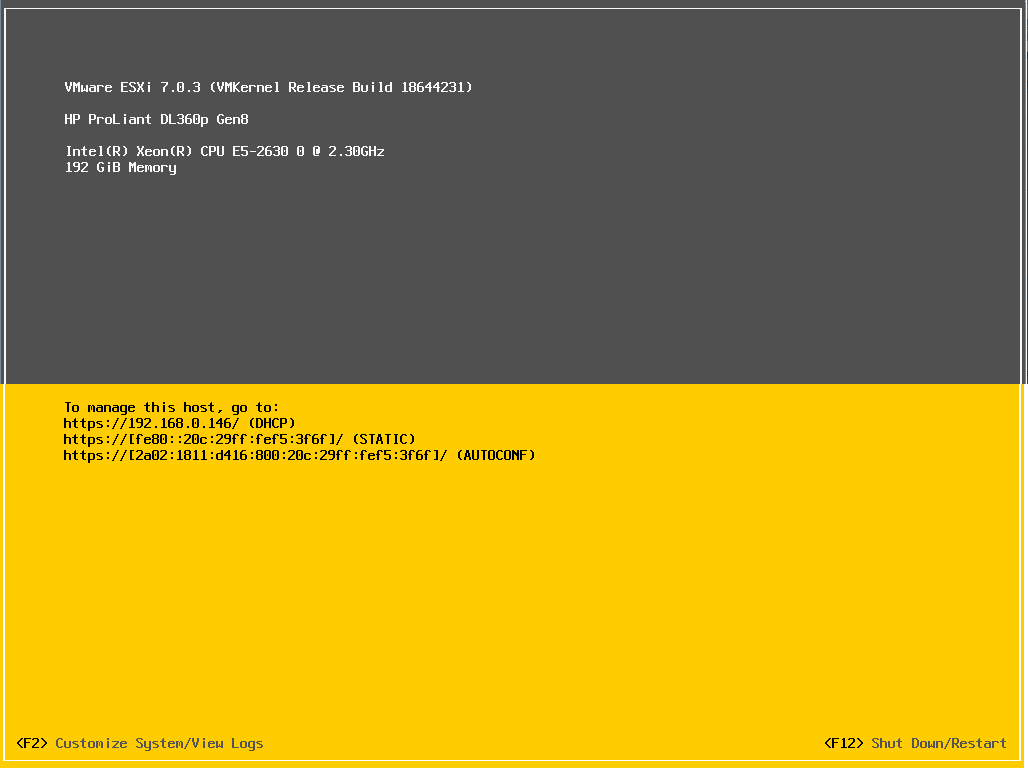
Installing ESXI on a server is a easy task, first go to the official site of VMware to get a installation file of esxi. Then you can use rufus to create a bootable USB thumb . Once that is done, plug the USB in the server and boot from that USB. One thing to keep in mind is that ESXI can be installed on a USB thumb, if you want that you'll need another usb thumb.
When the initialization of the installer if done, you will see following screen. Press enter to continue,followed by F11 to accept the EULA.
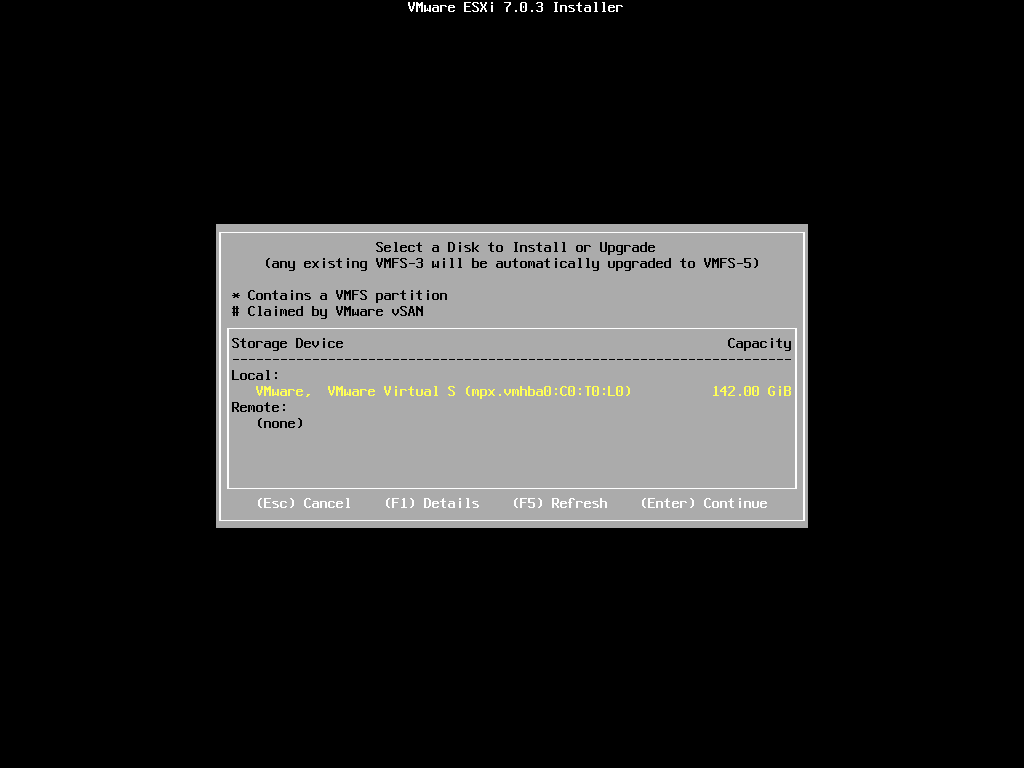
Next, you should have the option to choose a disk onto which you wish to install ESXi. Select the drive and press enter.
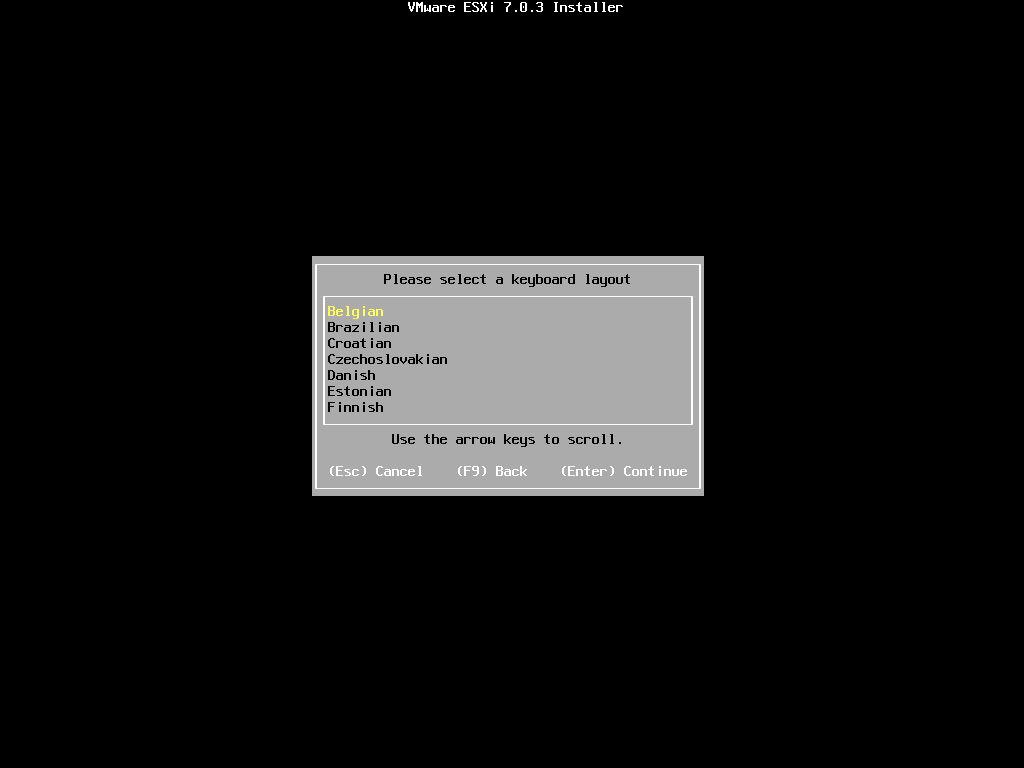
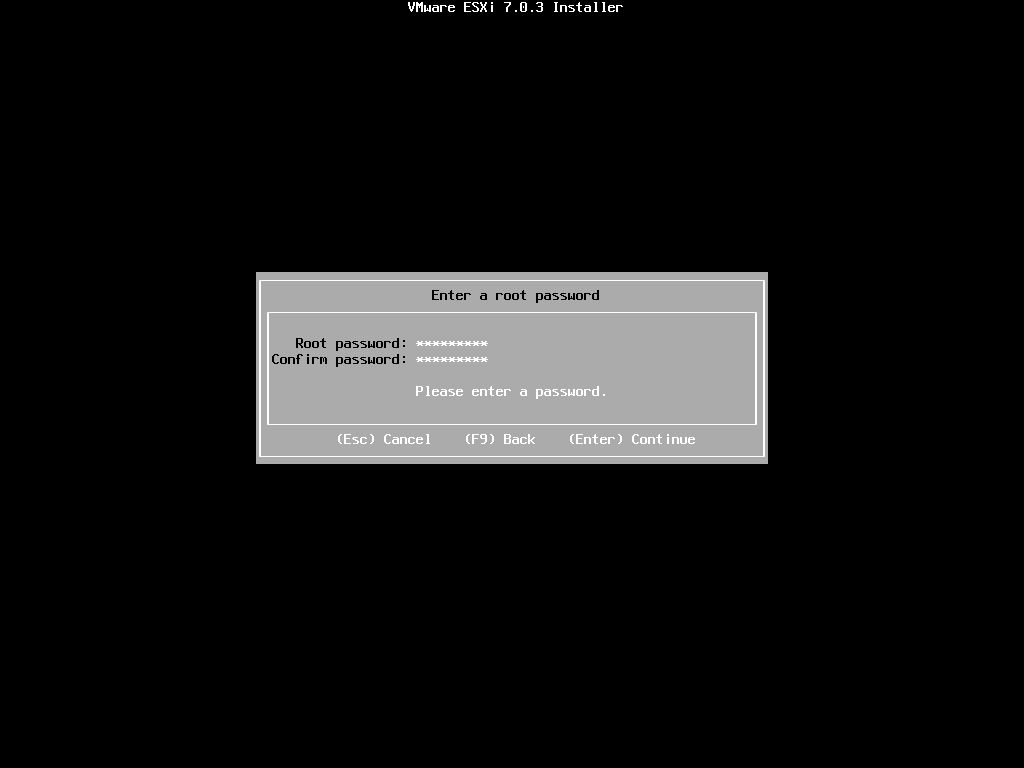
After you select the drive, you need to select a keyboard layout. Make sure that you select the correct keyboard layout, because next you need to enter the root password
By default, you must include a mix of at least three from the following four character classes:
- Lowercase letters
- Uppercase letters
- Numbers
- Special characters such as underscore or dash
when you create a password.
ESXI - Network settings
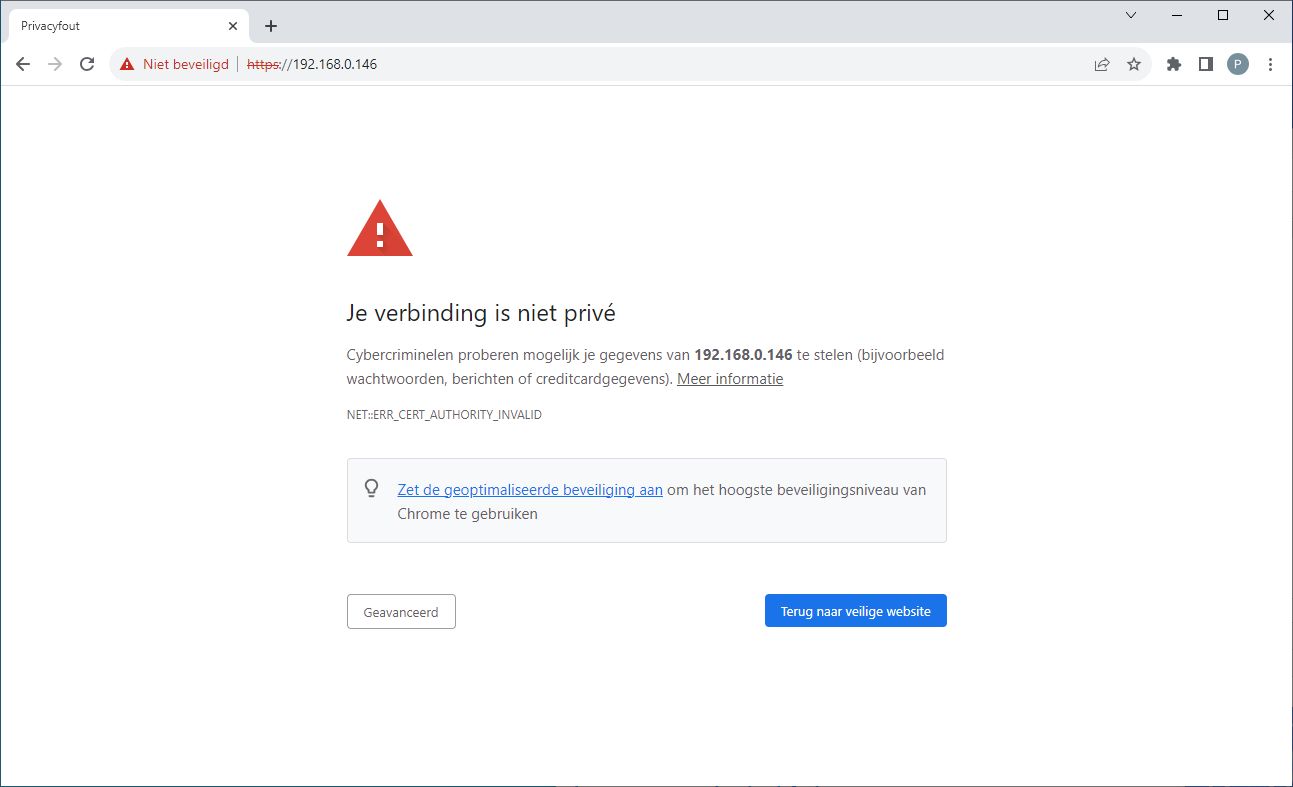
When you first navigate to the website of ESXI you will see this error message on your browser. This is because the certificate of the ESXI webserver is self signed certificate. To resolve this issue you can click advanced and then continue to login to the site, the credentials are the same as you used during the installation part. In ESXI, you also have the option to install your own certificates, although that is not something we'll address at this moment.
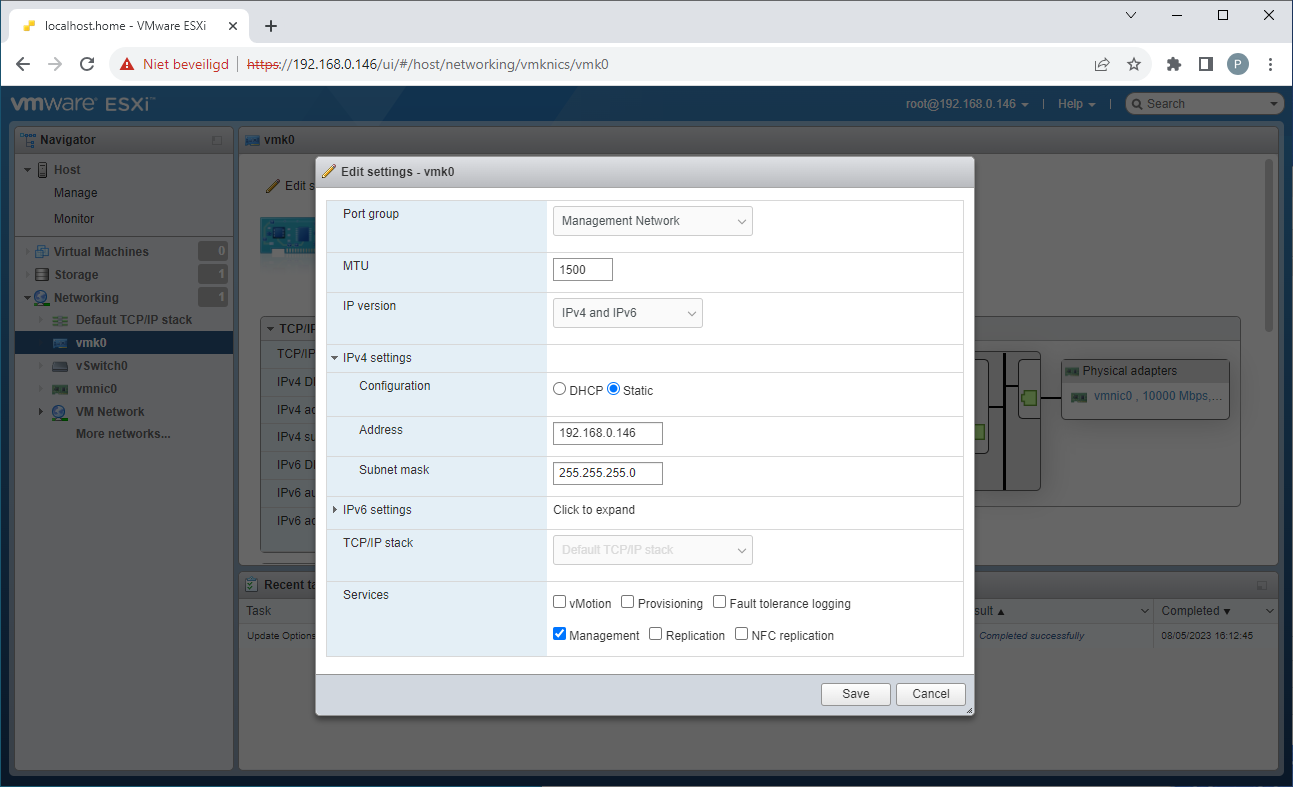
Next,we will allocate a static IP address to the server. After logging in, access the 'Networking' segment from the left navigation bar, then choose 'VMKernel NICs' to oversee network interfaces. Click on VMK0 and modify settings, proceed to the IPv4 section, click the dropdown icon, opt for 'static,' and input your preferred IPv4 address.
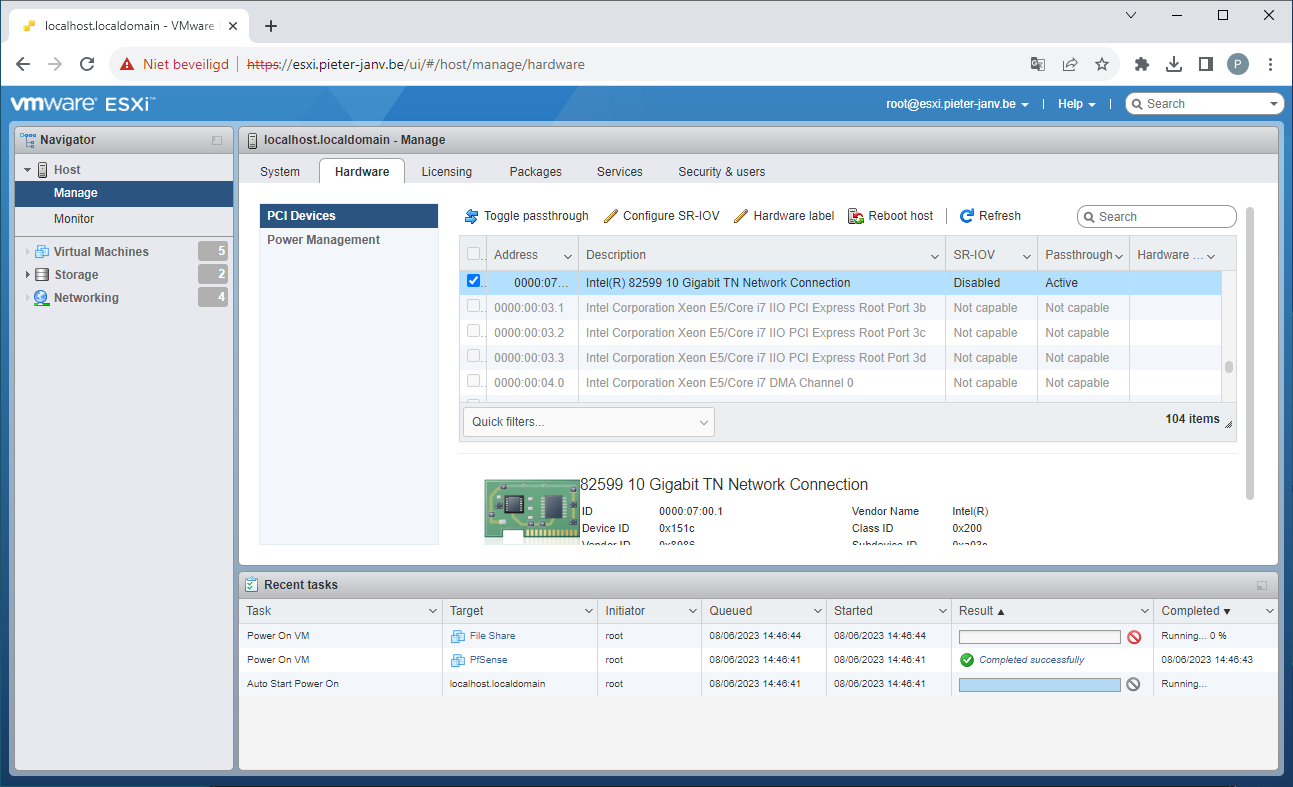
I plan to use a firewall for managing network traffic between my home network and my homelab. To achieve this, I utilize ESXI's PCIe passthrough feature, enabling me to establish a connection between a physical NIC and the firewall. To enable PCIE passthru go to manage in the left sidebar, then click on hardware. There you will see all PCIE devices. Find the NIC and click "Toggle passthrough".
This physical NIC will be used as an uplink, the firewall also needs a switch to connect multible VM's to it. To do this go to Networking, select "Virtual switches" and create a new one. Because our switch doesn't need an uplink you can delete the uplink option.

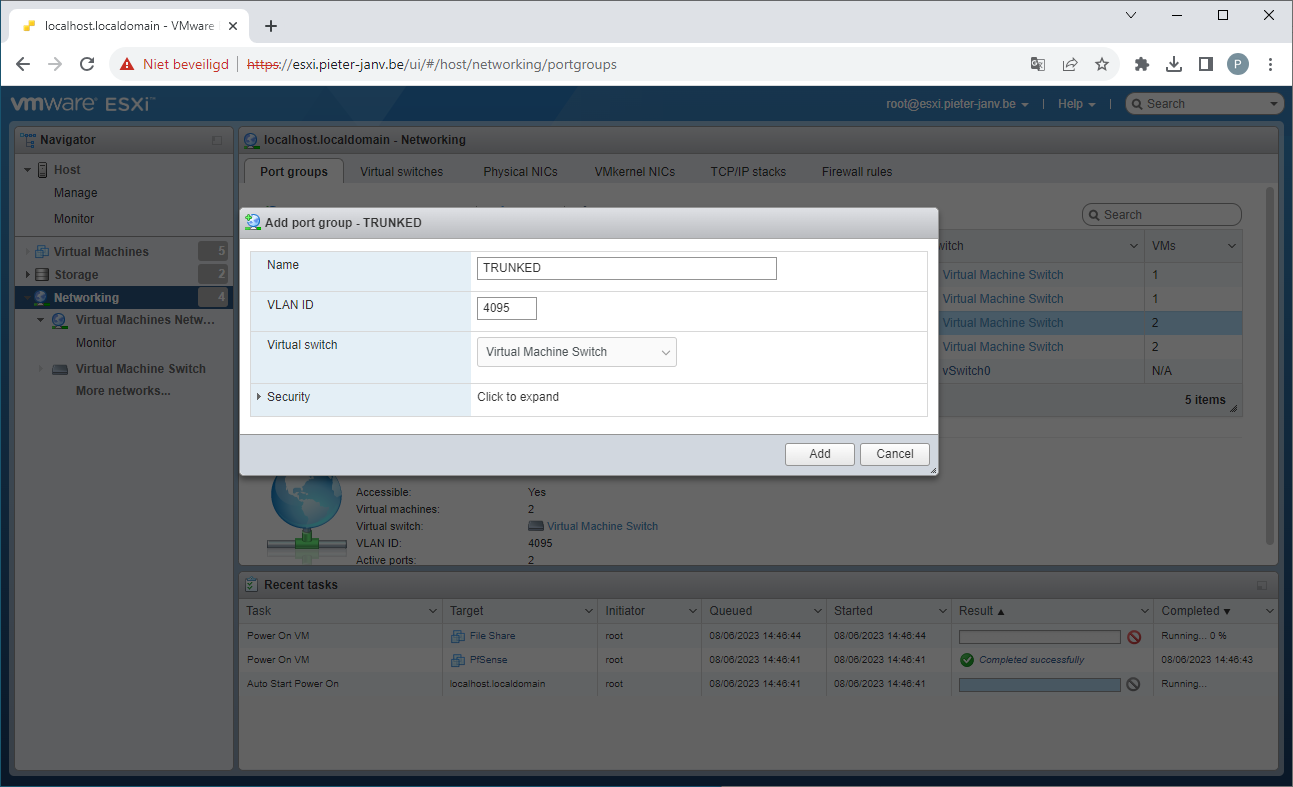
Now that our vswitch is created we need to add "Port groups" to it, select "Port Groups", then click on "Add port group". To segmentation the different networks with vlan you need to use a Trunked port, to do that you need to fill 4095 as VLAN ID. Select the newly created vswitch from the dropdown menu.
Everytime you want to create a new vlan network you need to add a port group, select the correct vswitch and enter the VLAN ID you want to use.
ESXI - Create a virtual machine
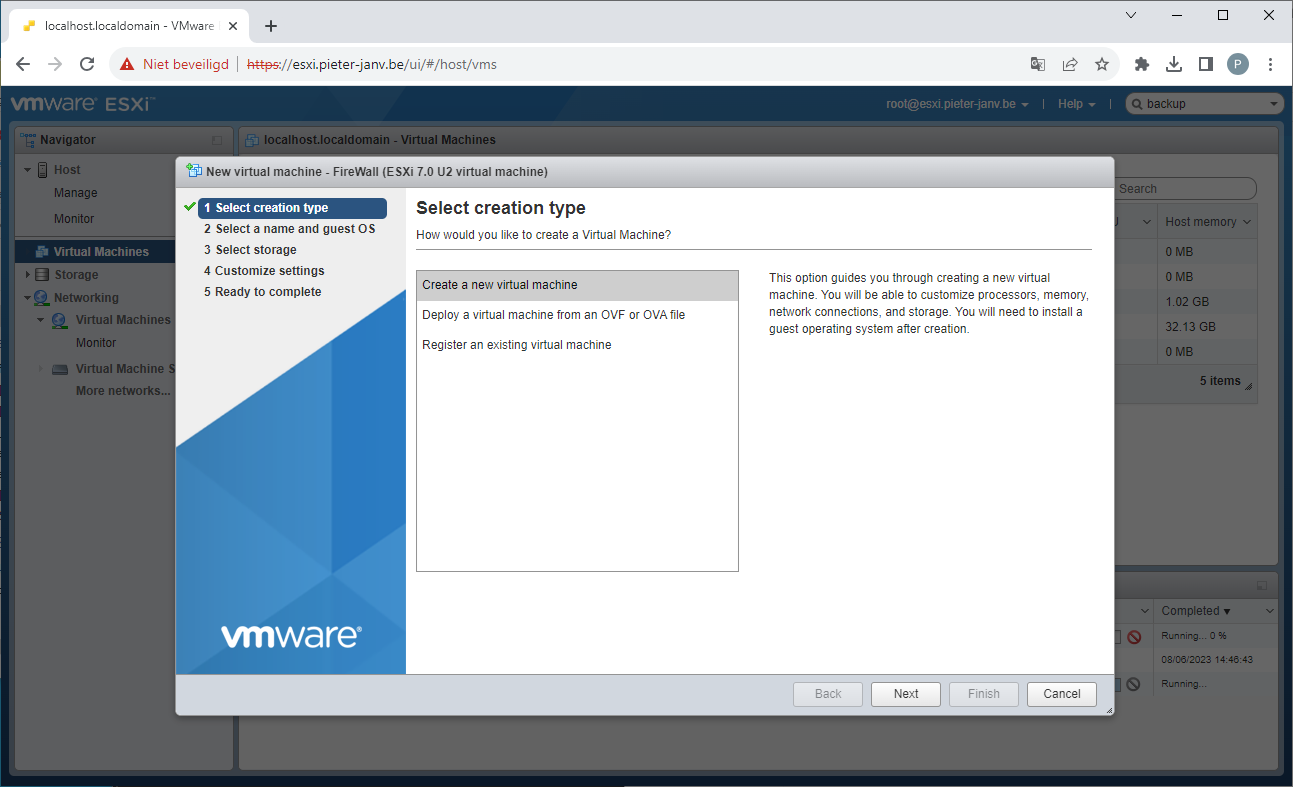
Now that our network setting are configured it's time to add a Firewall to our network. In the next section i will explain how i configured the Firewall. For now i will show you how to create a new Virtual Machine in ESXI.
Go to "Virtual Machines" and click on Add Virtual Machines. A new windows will appear, select "Create a new Virtual Machine" and click next.
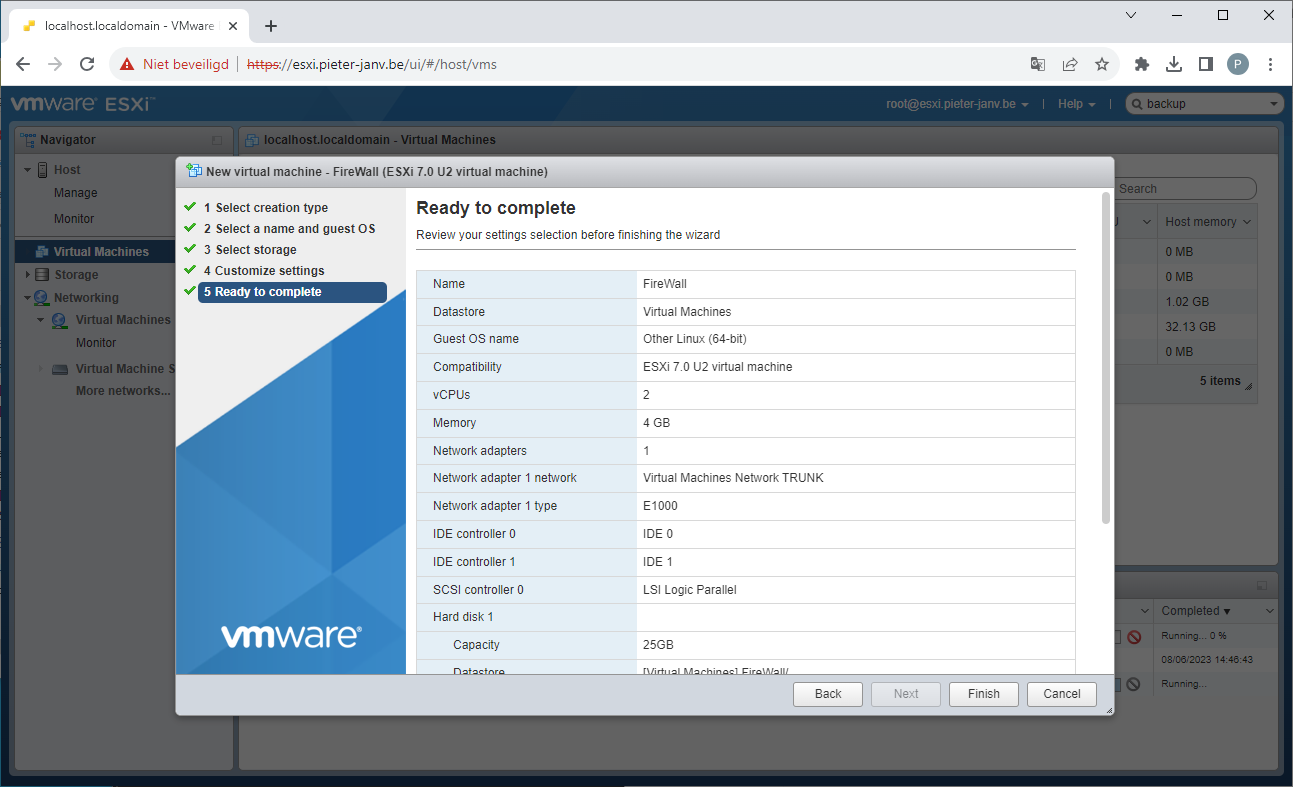
In the following window, you need to provide a name for your Virtual Machine and select the operating system it will be running.

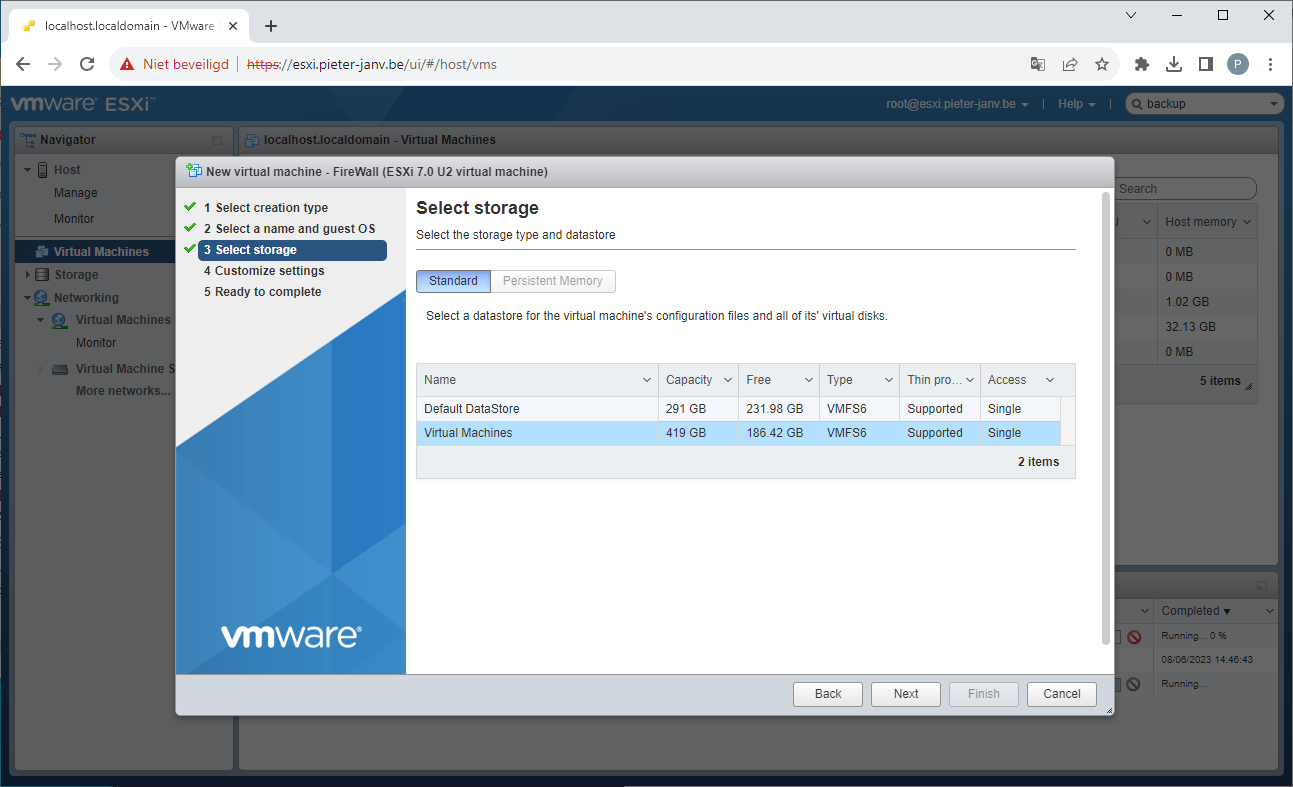
Then, you are required to choose a datastore where the Virtual Machine can be stored.
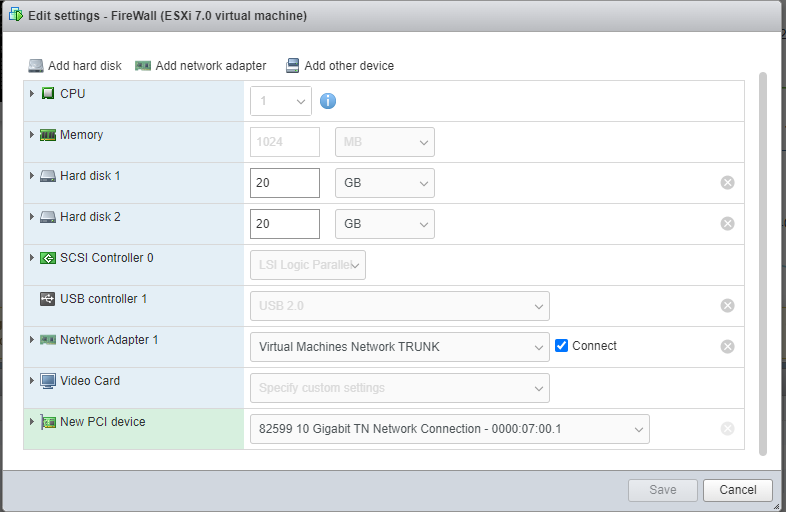
During the next step, you will determine the desired size of the hard drive and allocate the appropriate amount of RAM for your Virtual Machine. In the "Network adapter" field you will select the recently created TRUNKED portgroup.
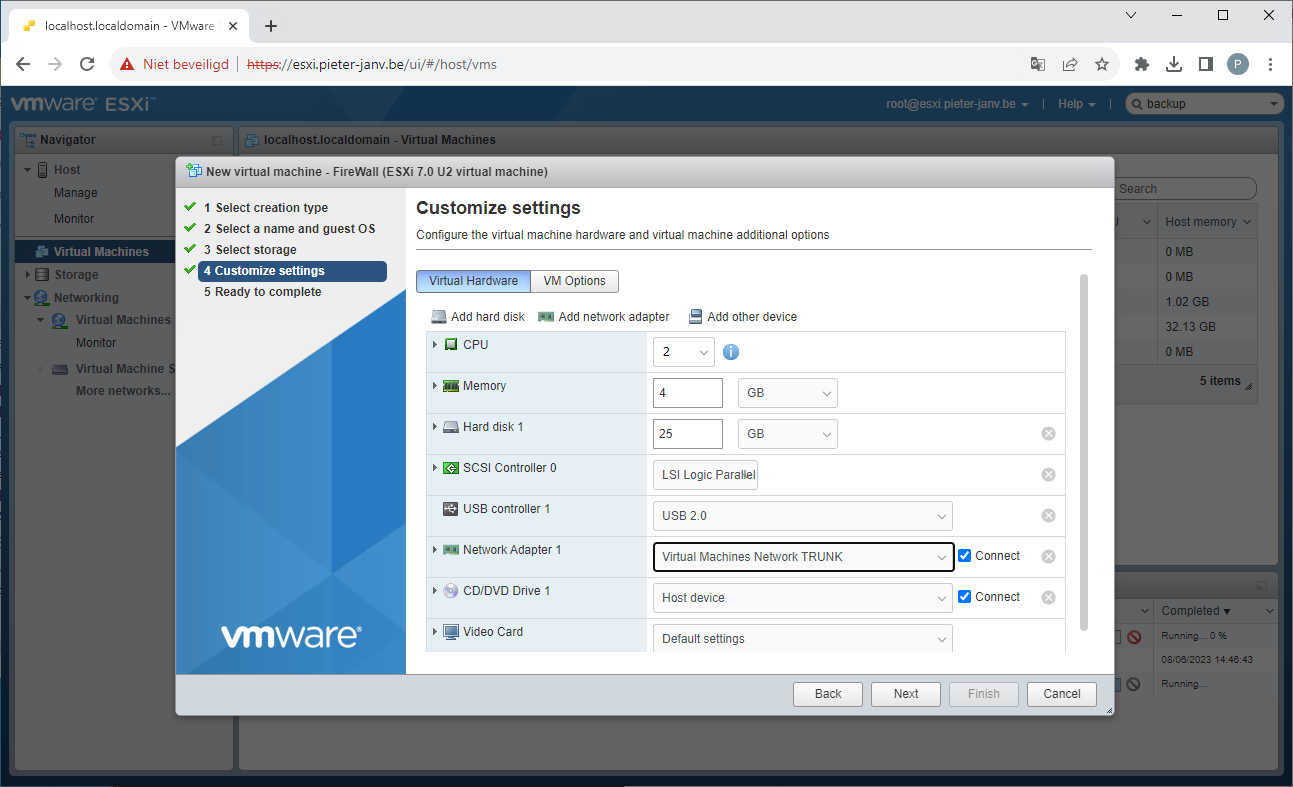
A firewall requires two network interface cards. As I mentioned earlier, I'll be using a PCIe passthrough NIC for the side that connects to the internet. Click on "Add other device", select PCIE device. And select the correct PCIE device from the dropdown menu.
Lastly, you can click on "Finished" to initiate the creation of the new Virtual Machine. Now the VM for the firewall has been created, in the next chapter i will install the OS and configured the firewall.